Build a Customer Service Agent
Build a Customer Service Agent
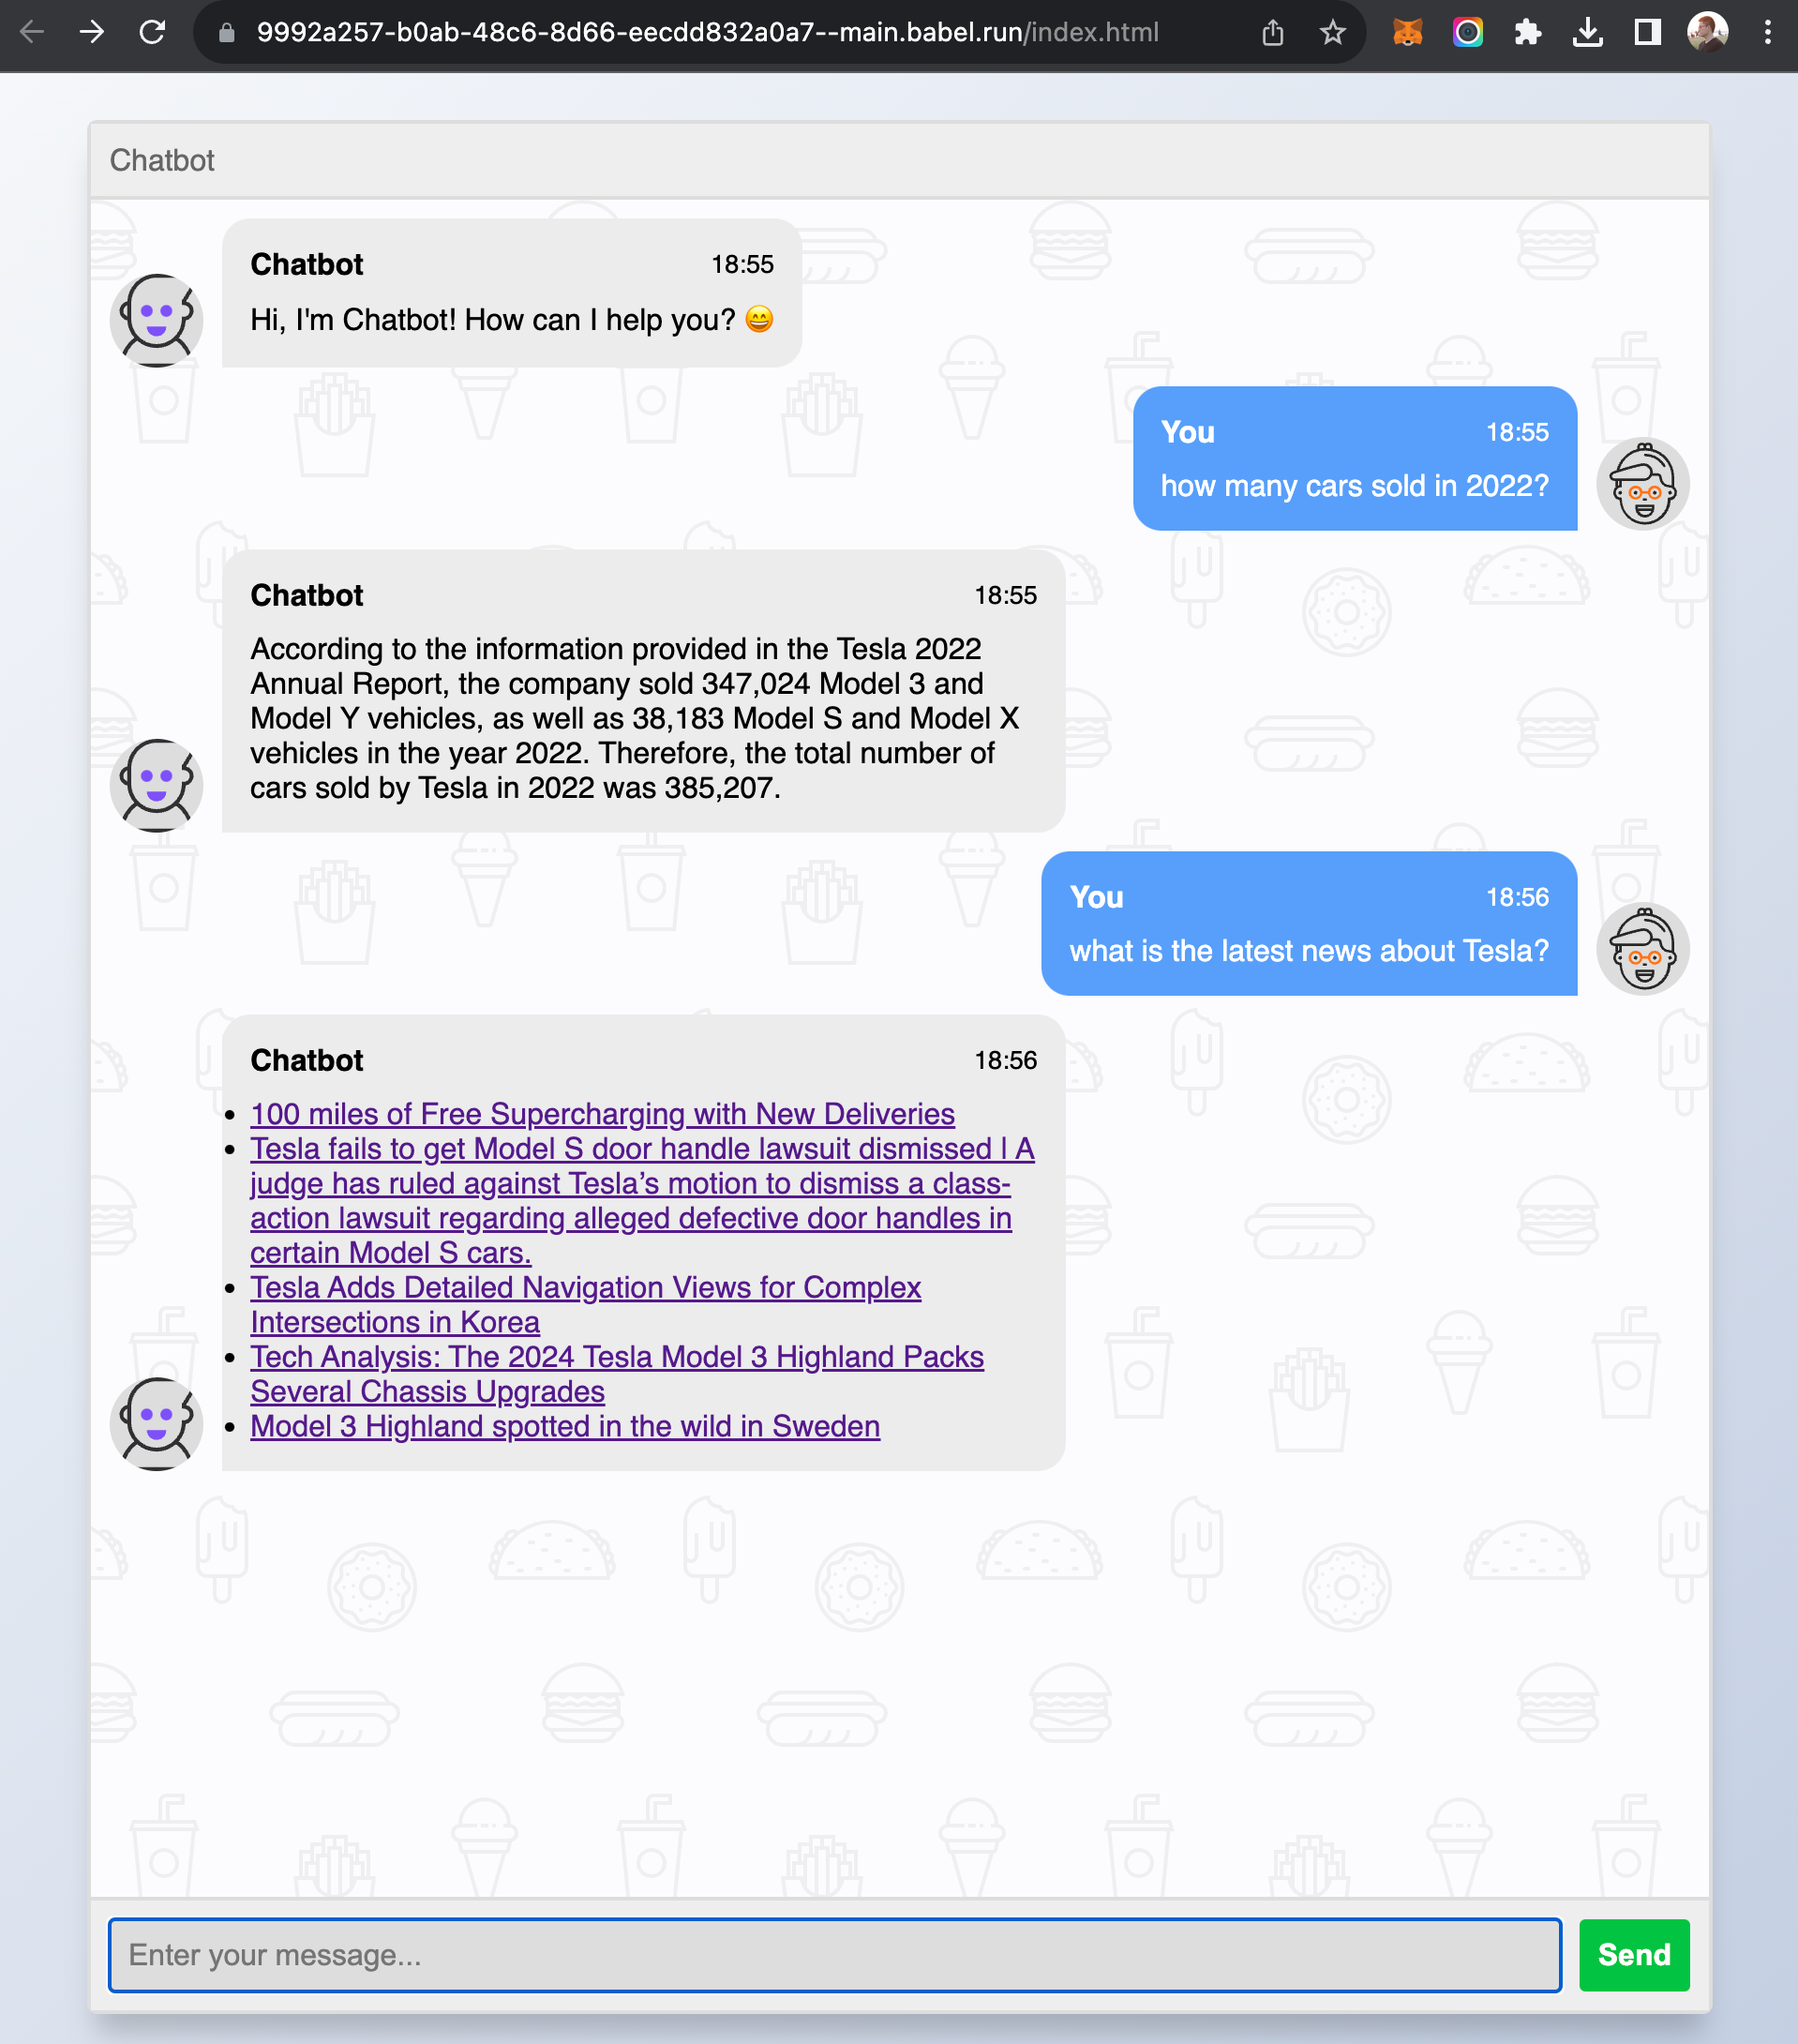
This tutorial demonstrates how to build a customer service AI bot(agent) which can answer user's questions based on knowledge base and grab latest news for the user. This app uses html/js/css as the frontend, VectorStore element as the knowledge base, LLMExecutor to call models and Assets element for raw knowledge files and frontend webpages.
Requirements
- User can chat with the agent through a web based chat box.
- User can ask any questions about Tesla financial reports in 2022.
- The agent will retrieve related information based on user's question from knowledge base.
- The agent calls OpenAI model with pre-defined prompt and retrieved info to get response.
- The user can ask the agent about latest news of Tesla.
- The agent will respond a list of brief news about Tesla.
Analysis
This requirement is a typical RAG based AI customer service agent. It also requires the agent to use tools(retrieve news from reddit) which depends on OpenAI model functions feature. The knowledge base can be pre-embedded into a VectorStore element.
Building the App
-
Download Tesla 2022 financial report: https://www.sec.gov/Archives/edgar/data/1318605/000119312523094100/d440358dars.pdf . Save the file as "Tesla-2022.pdf".
-
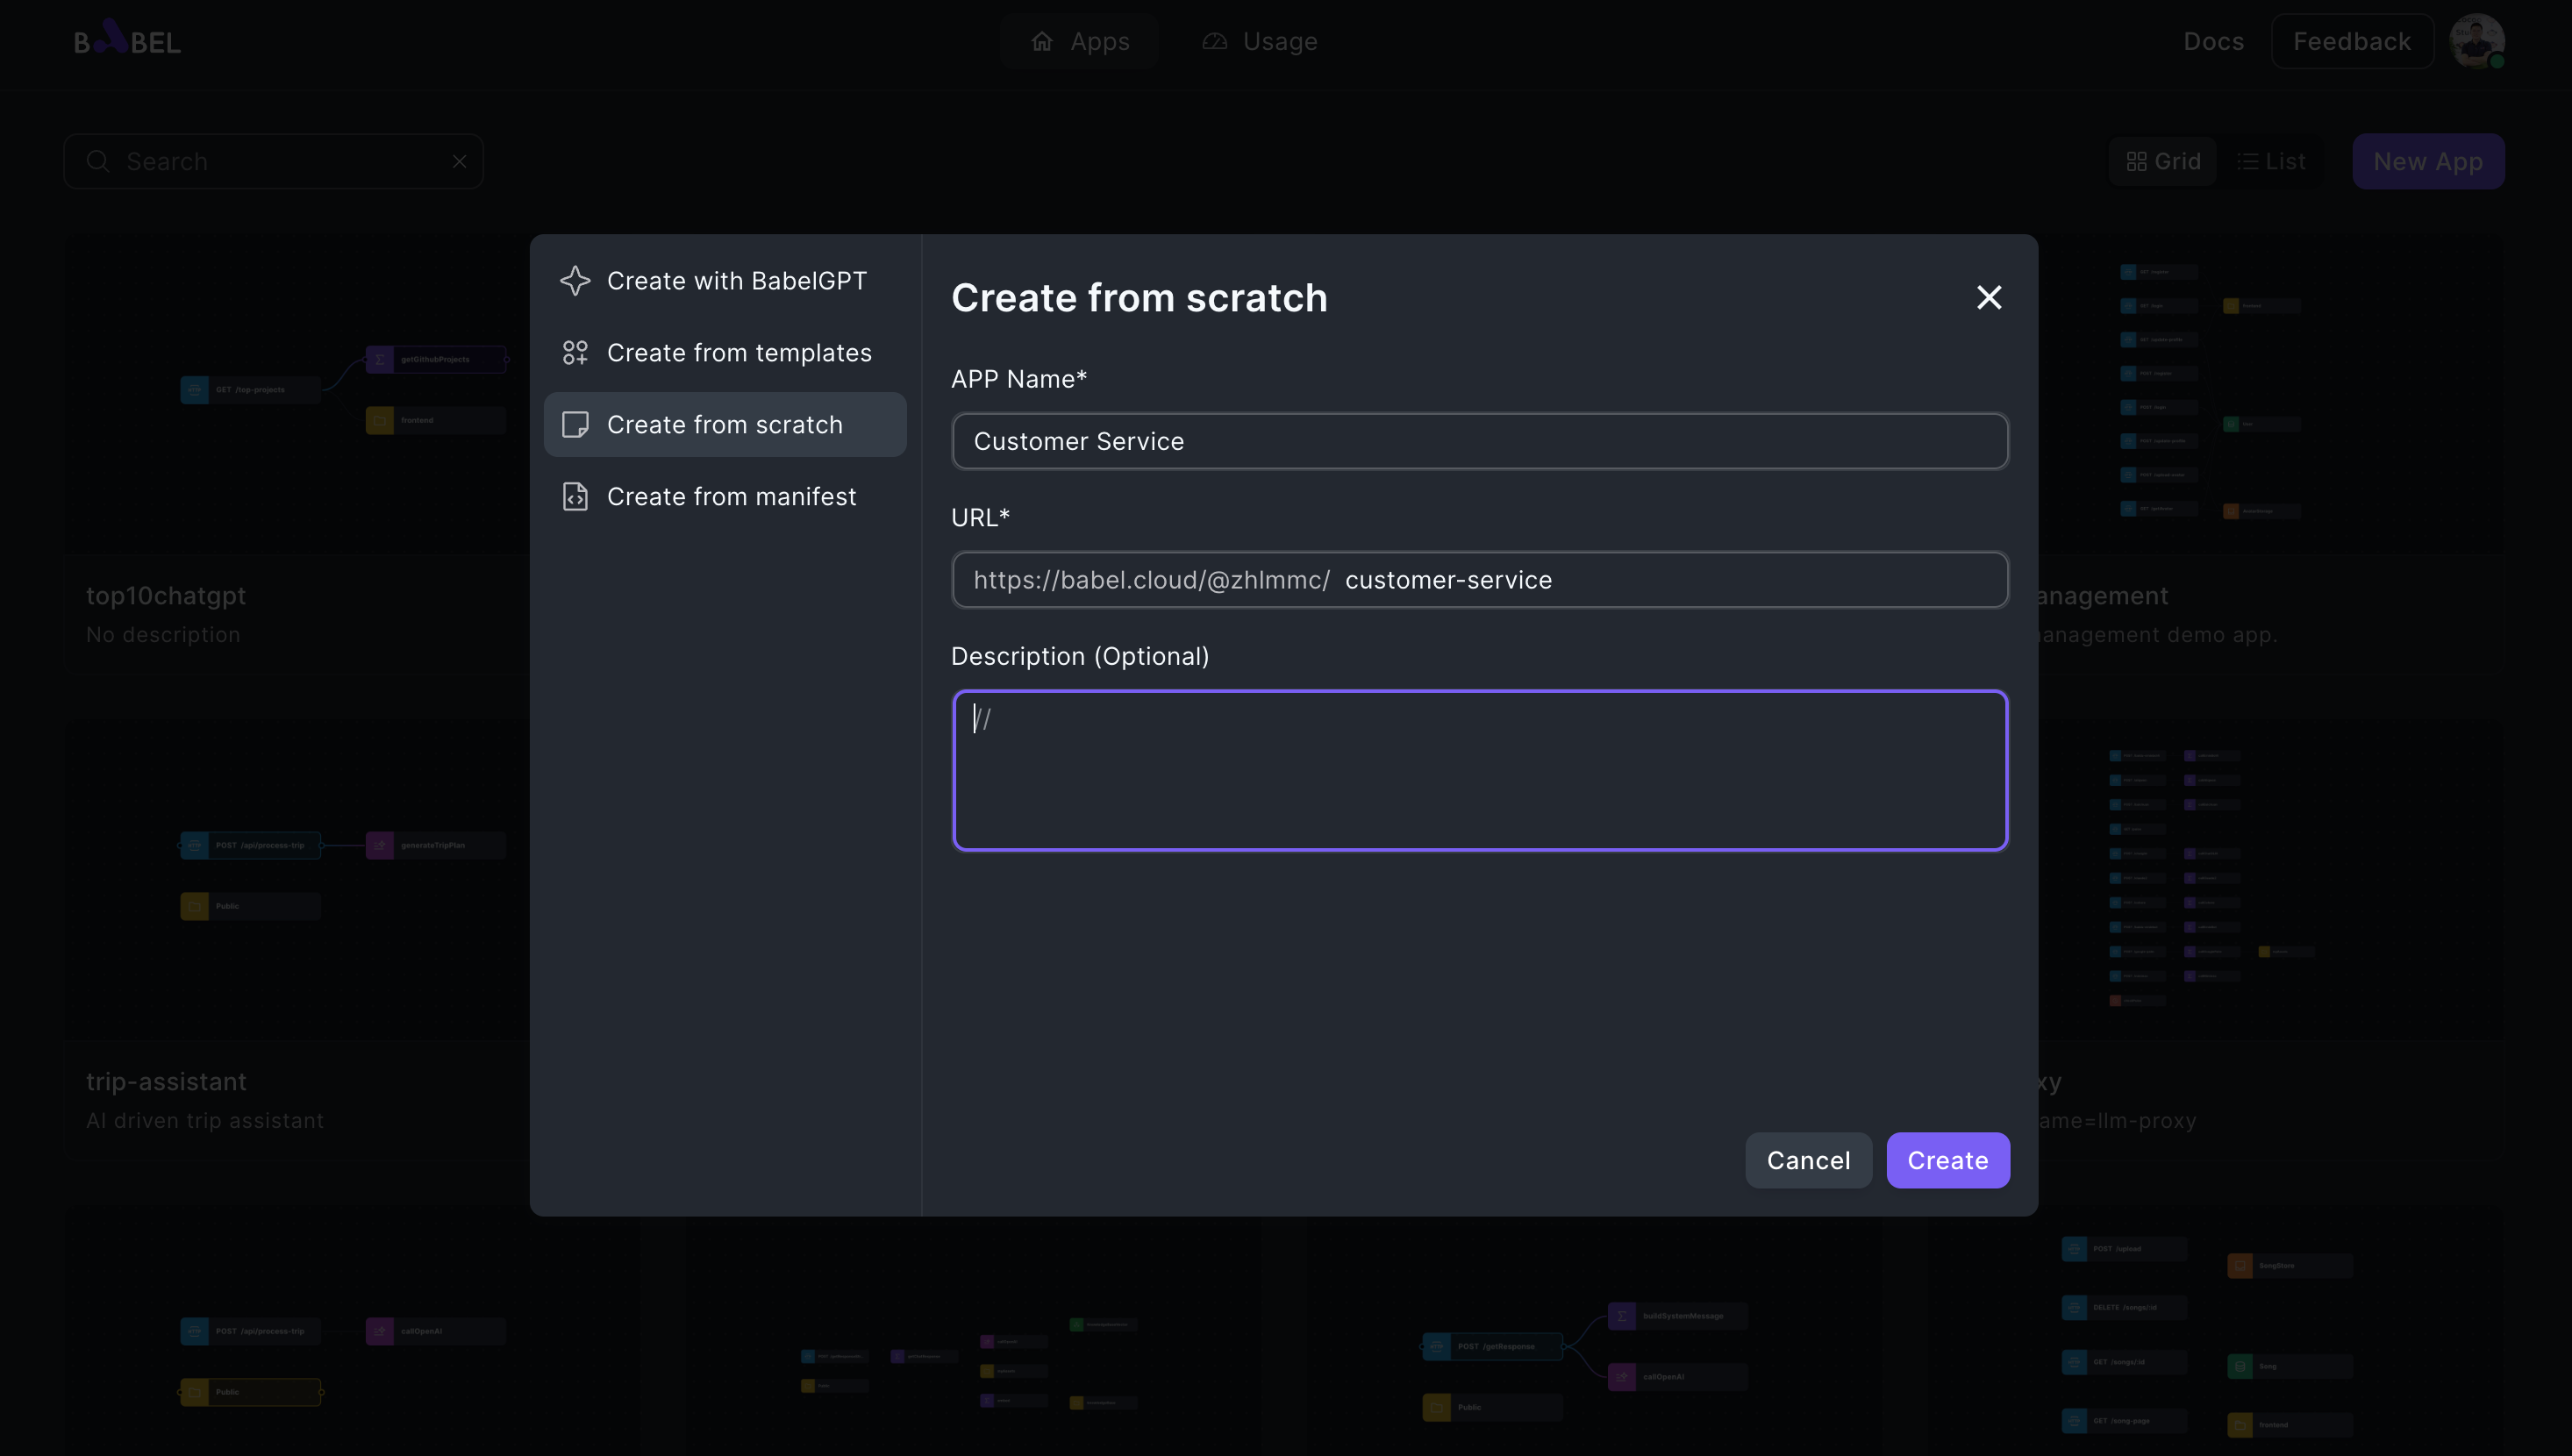
Create a new Babel application from scratch
-
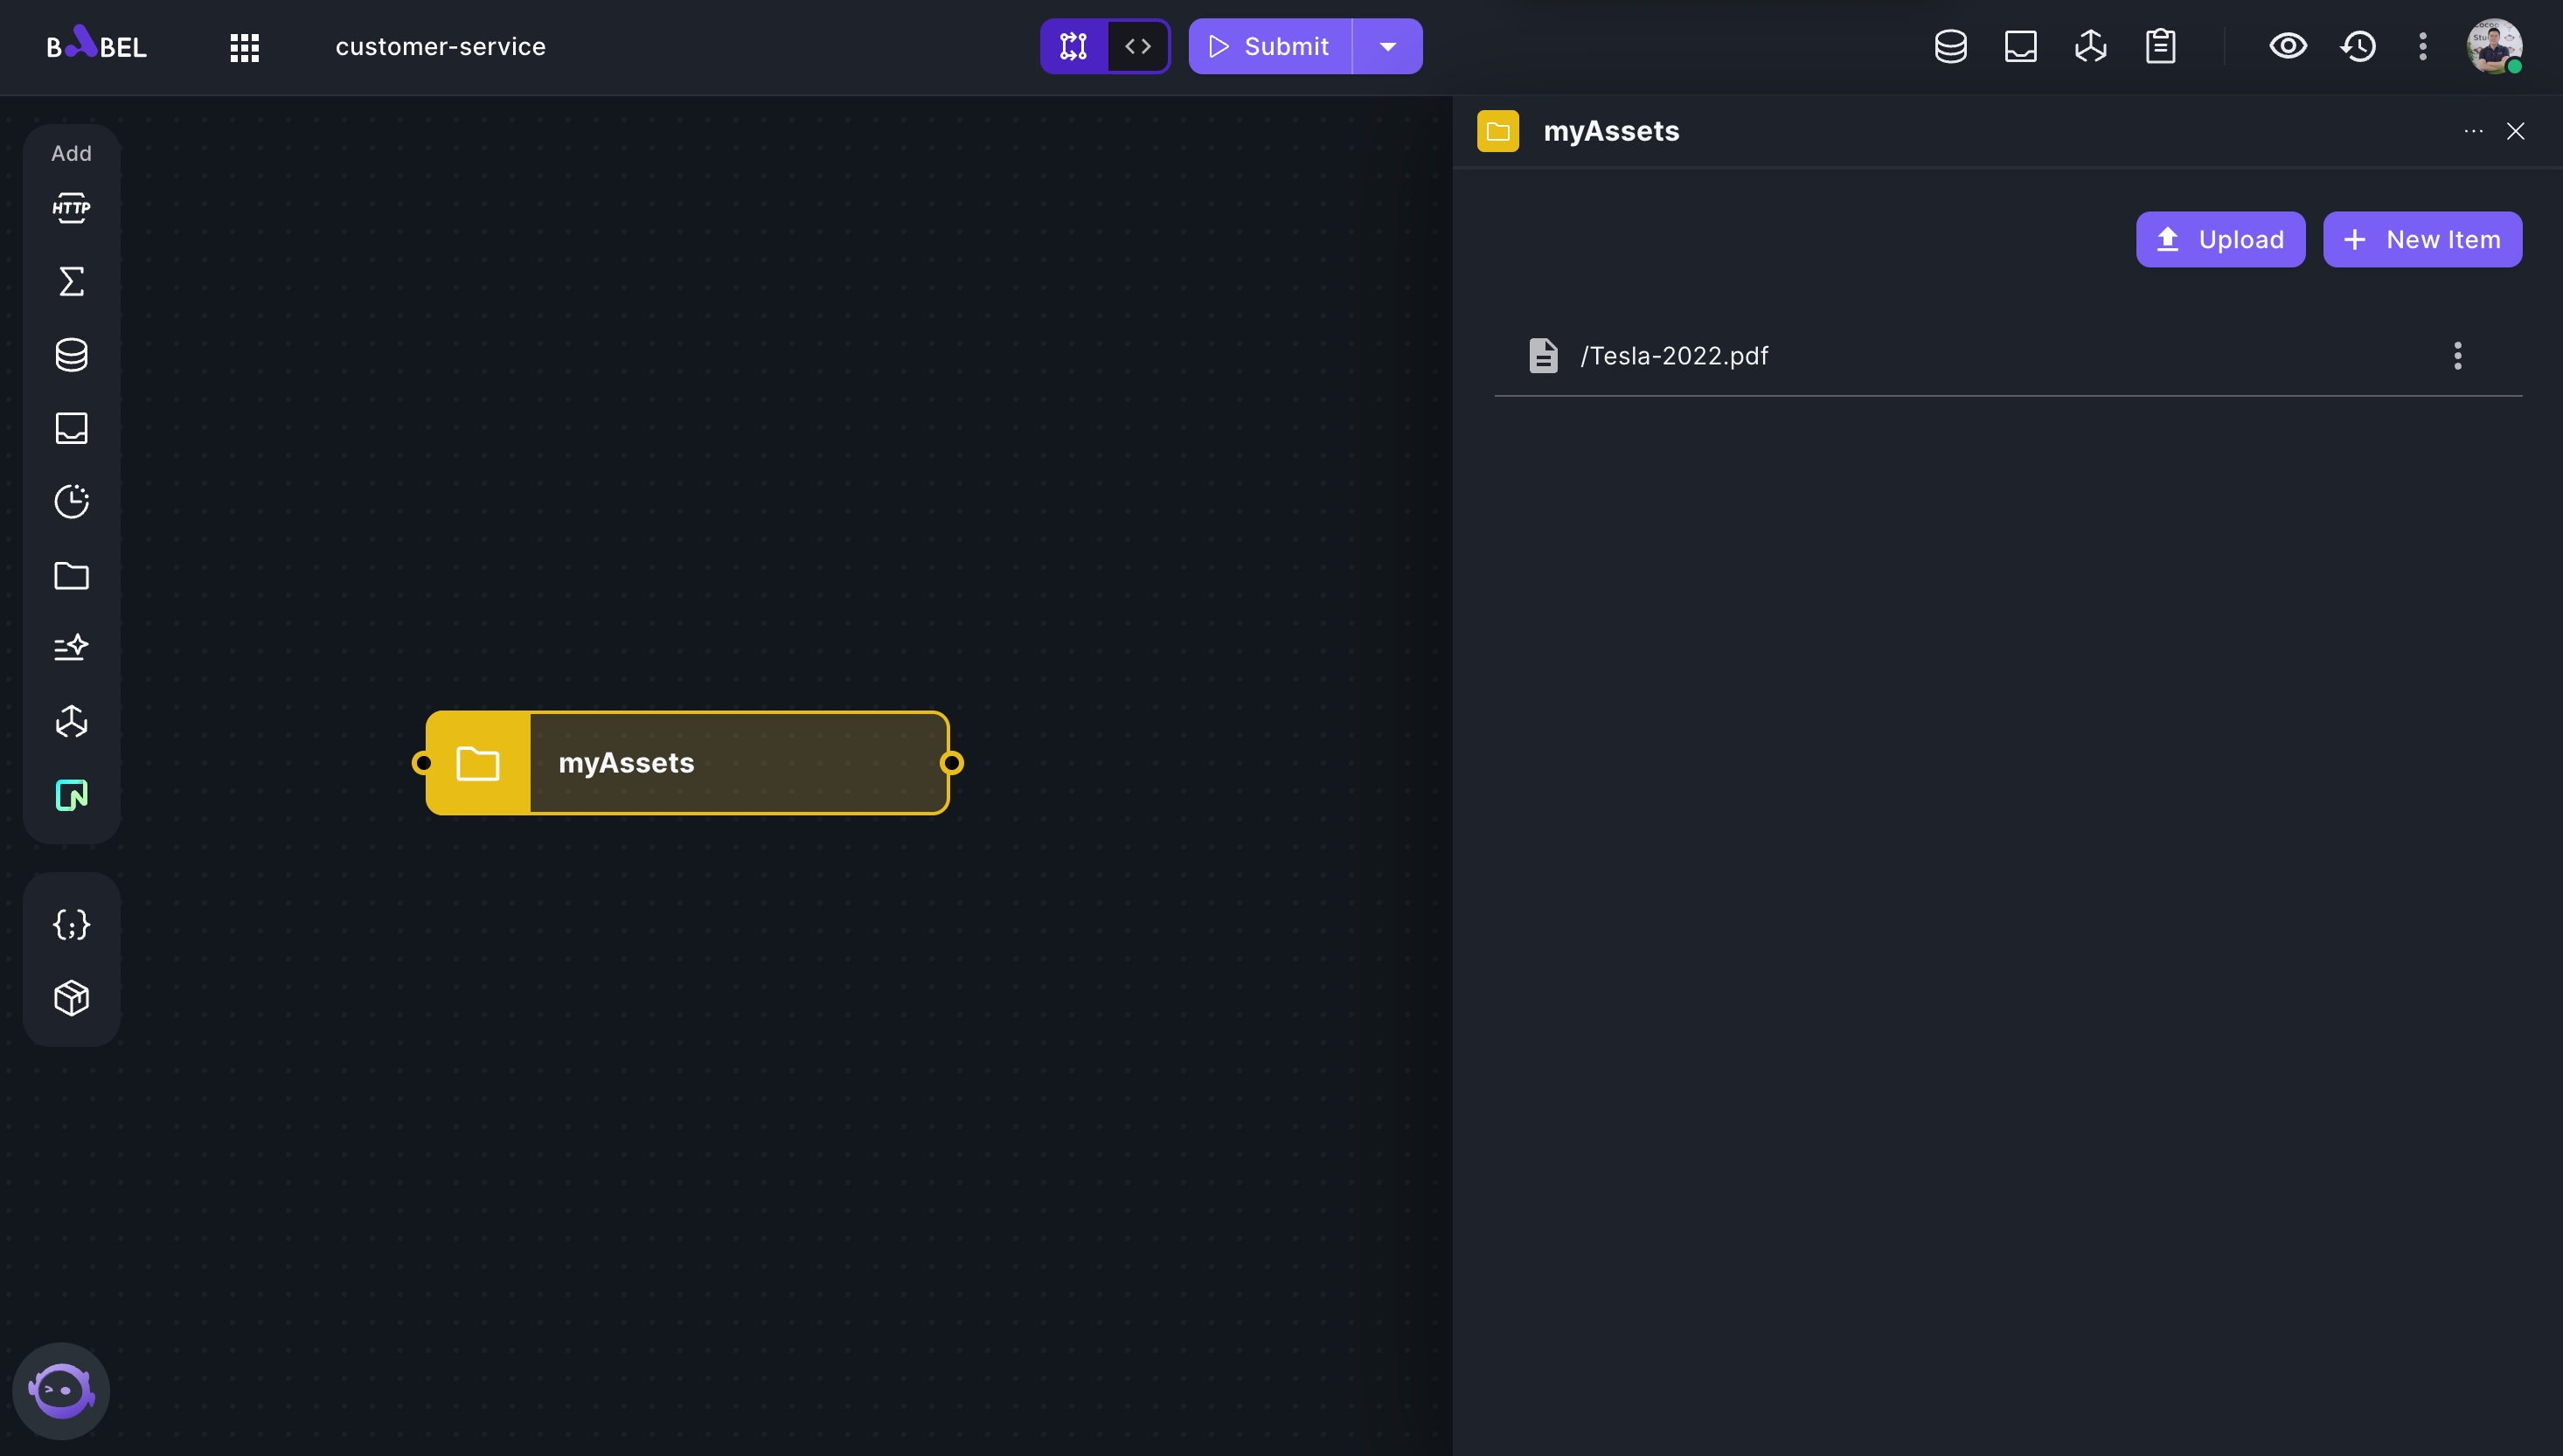
Add an Assets element and upload "Tesla-2022.pdf"
-
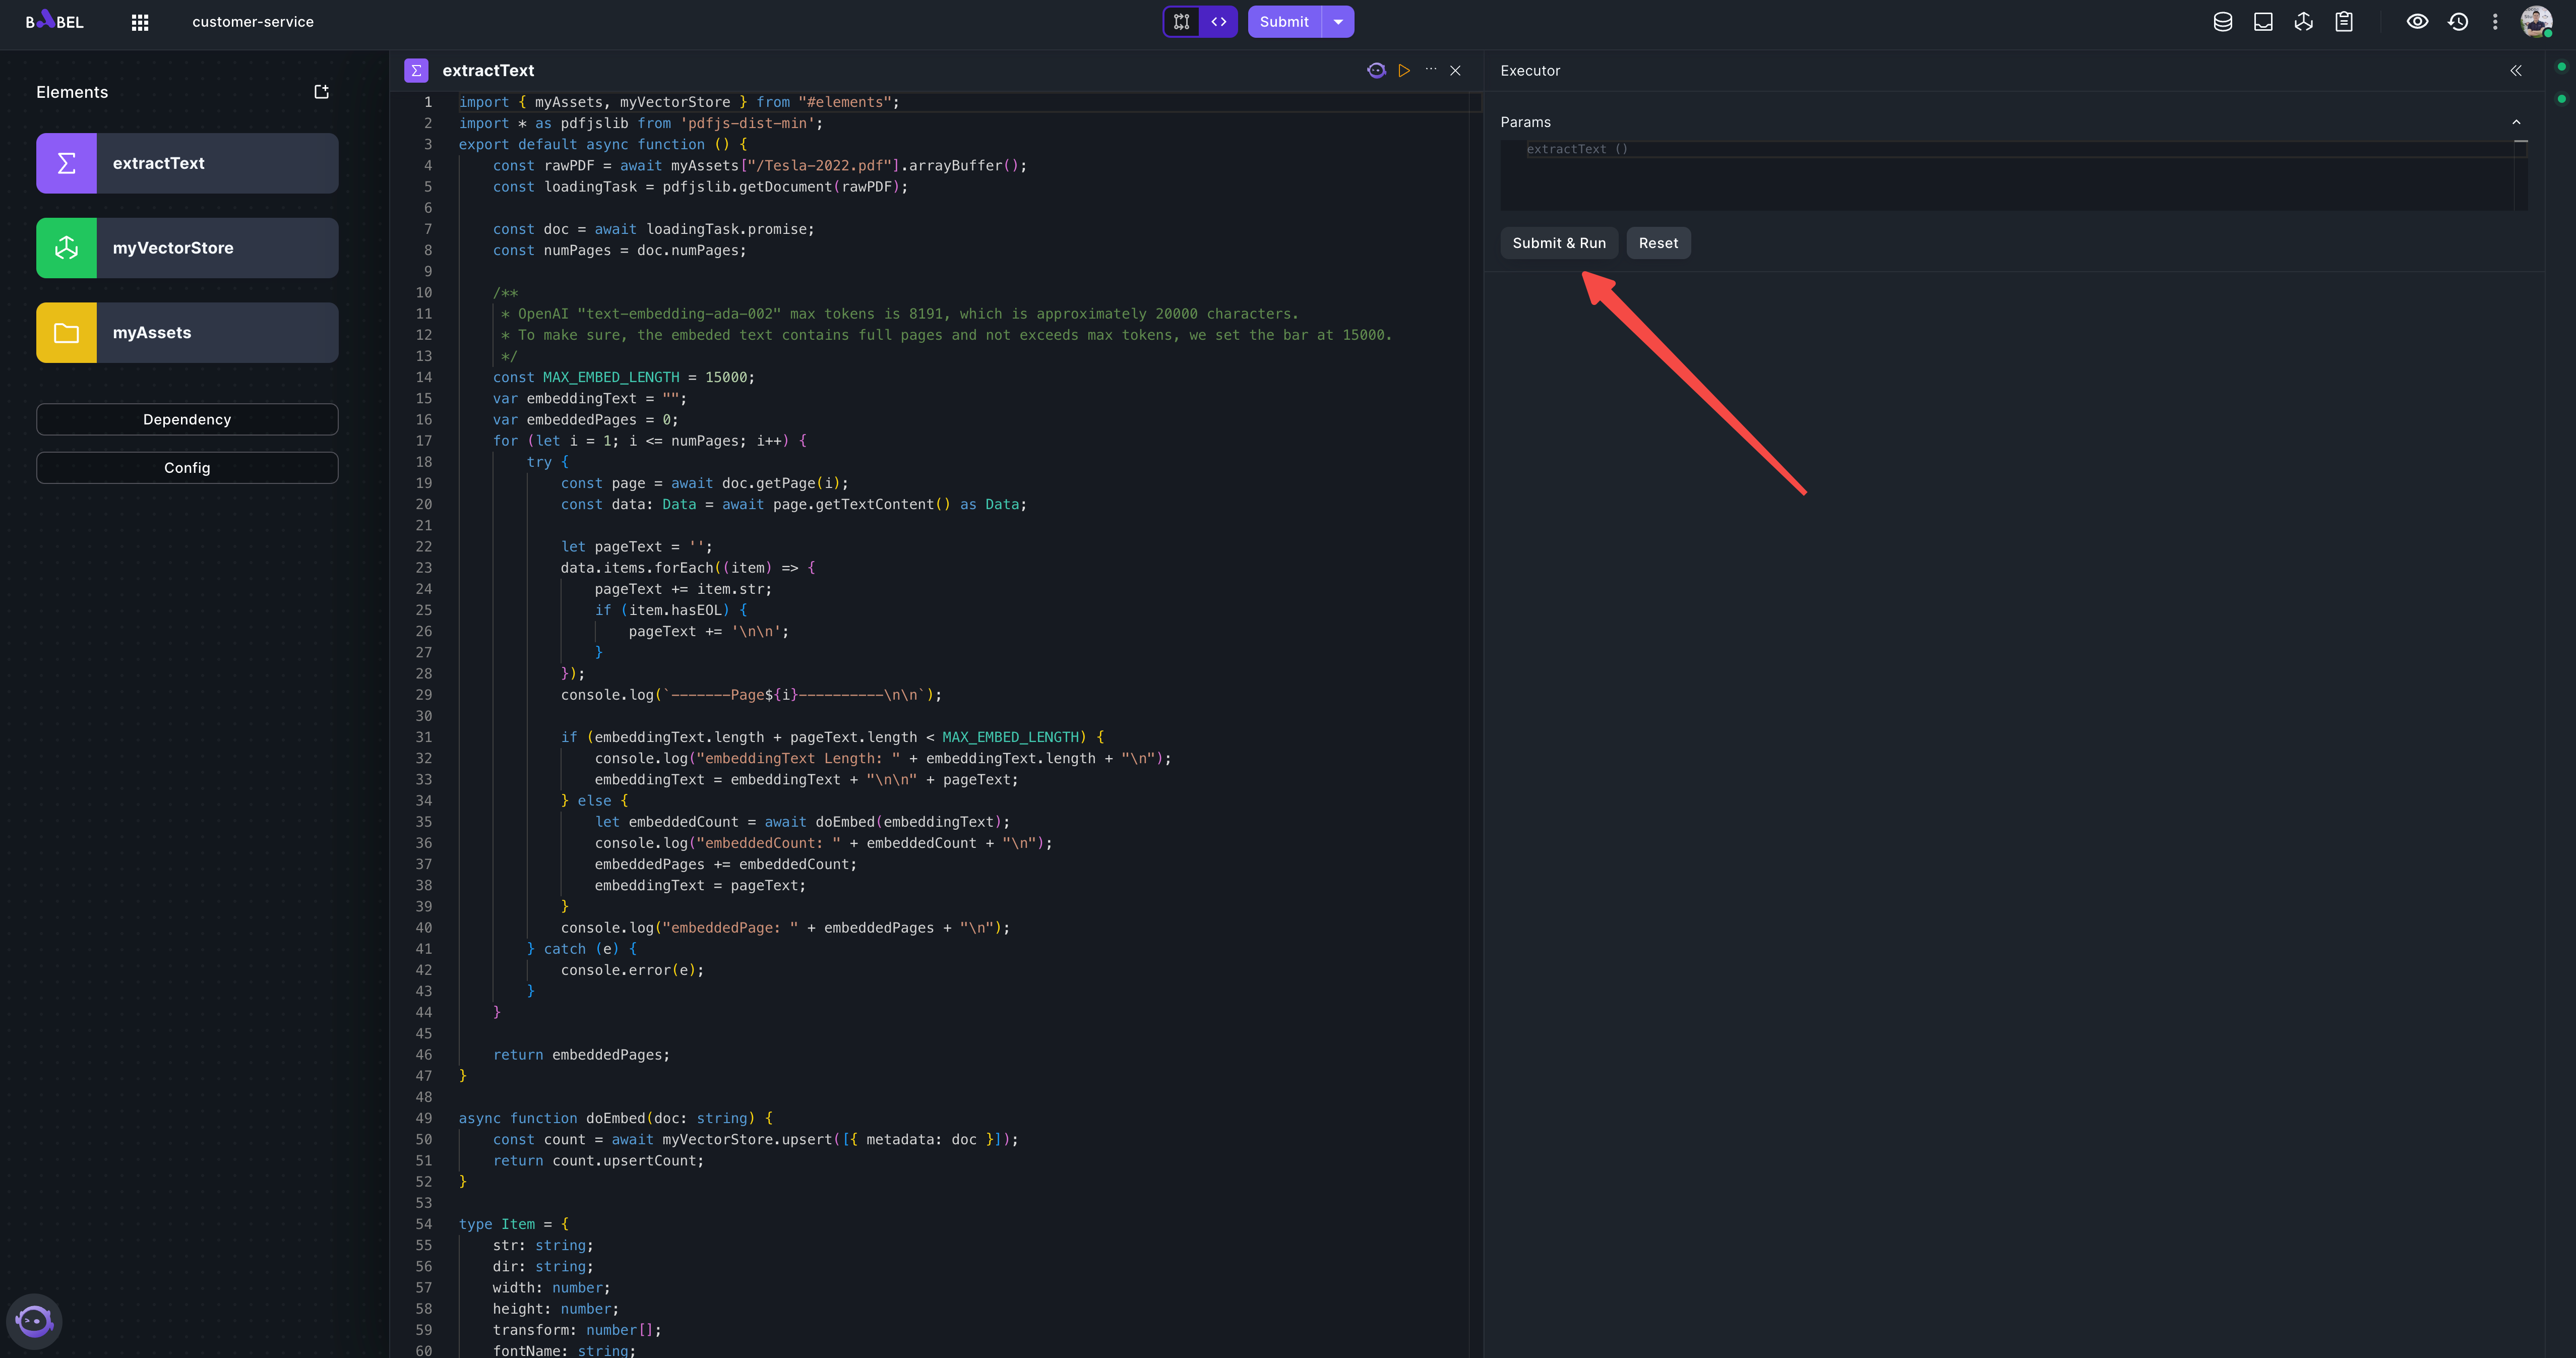
Add a Function element "extractText" that reads text content from PDF and embed the content to a VectorStore element.
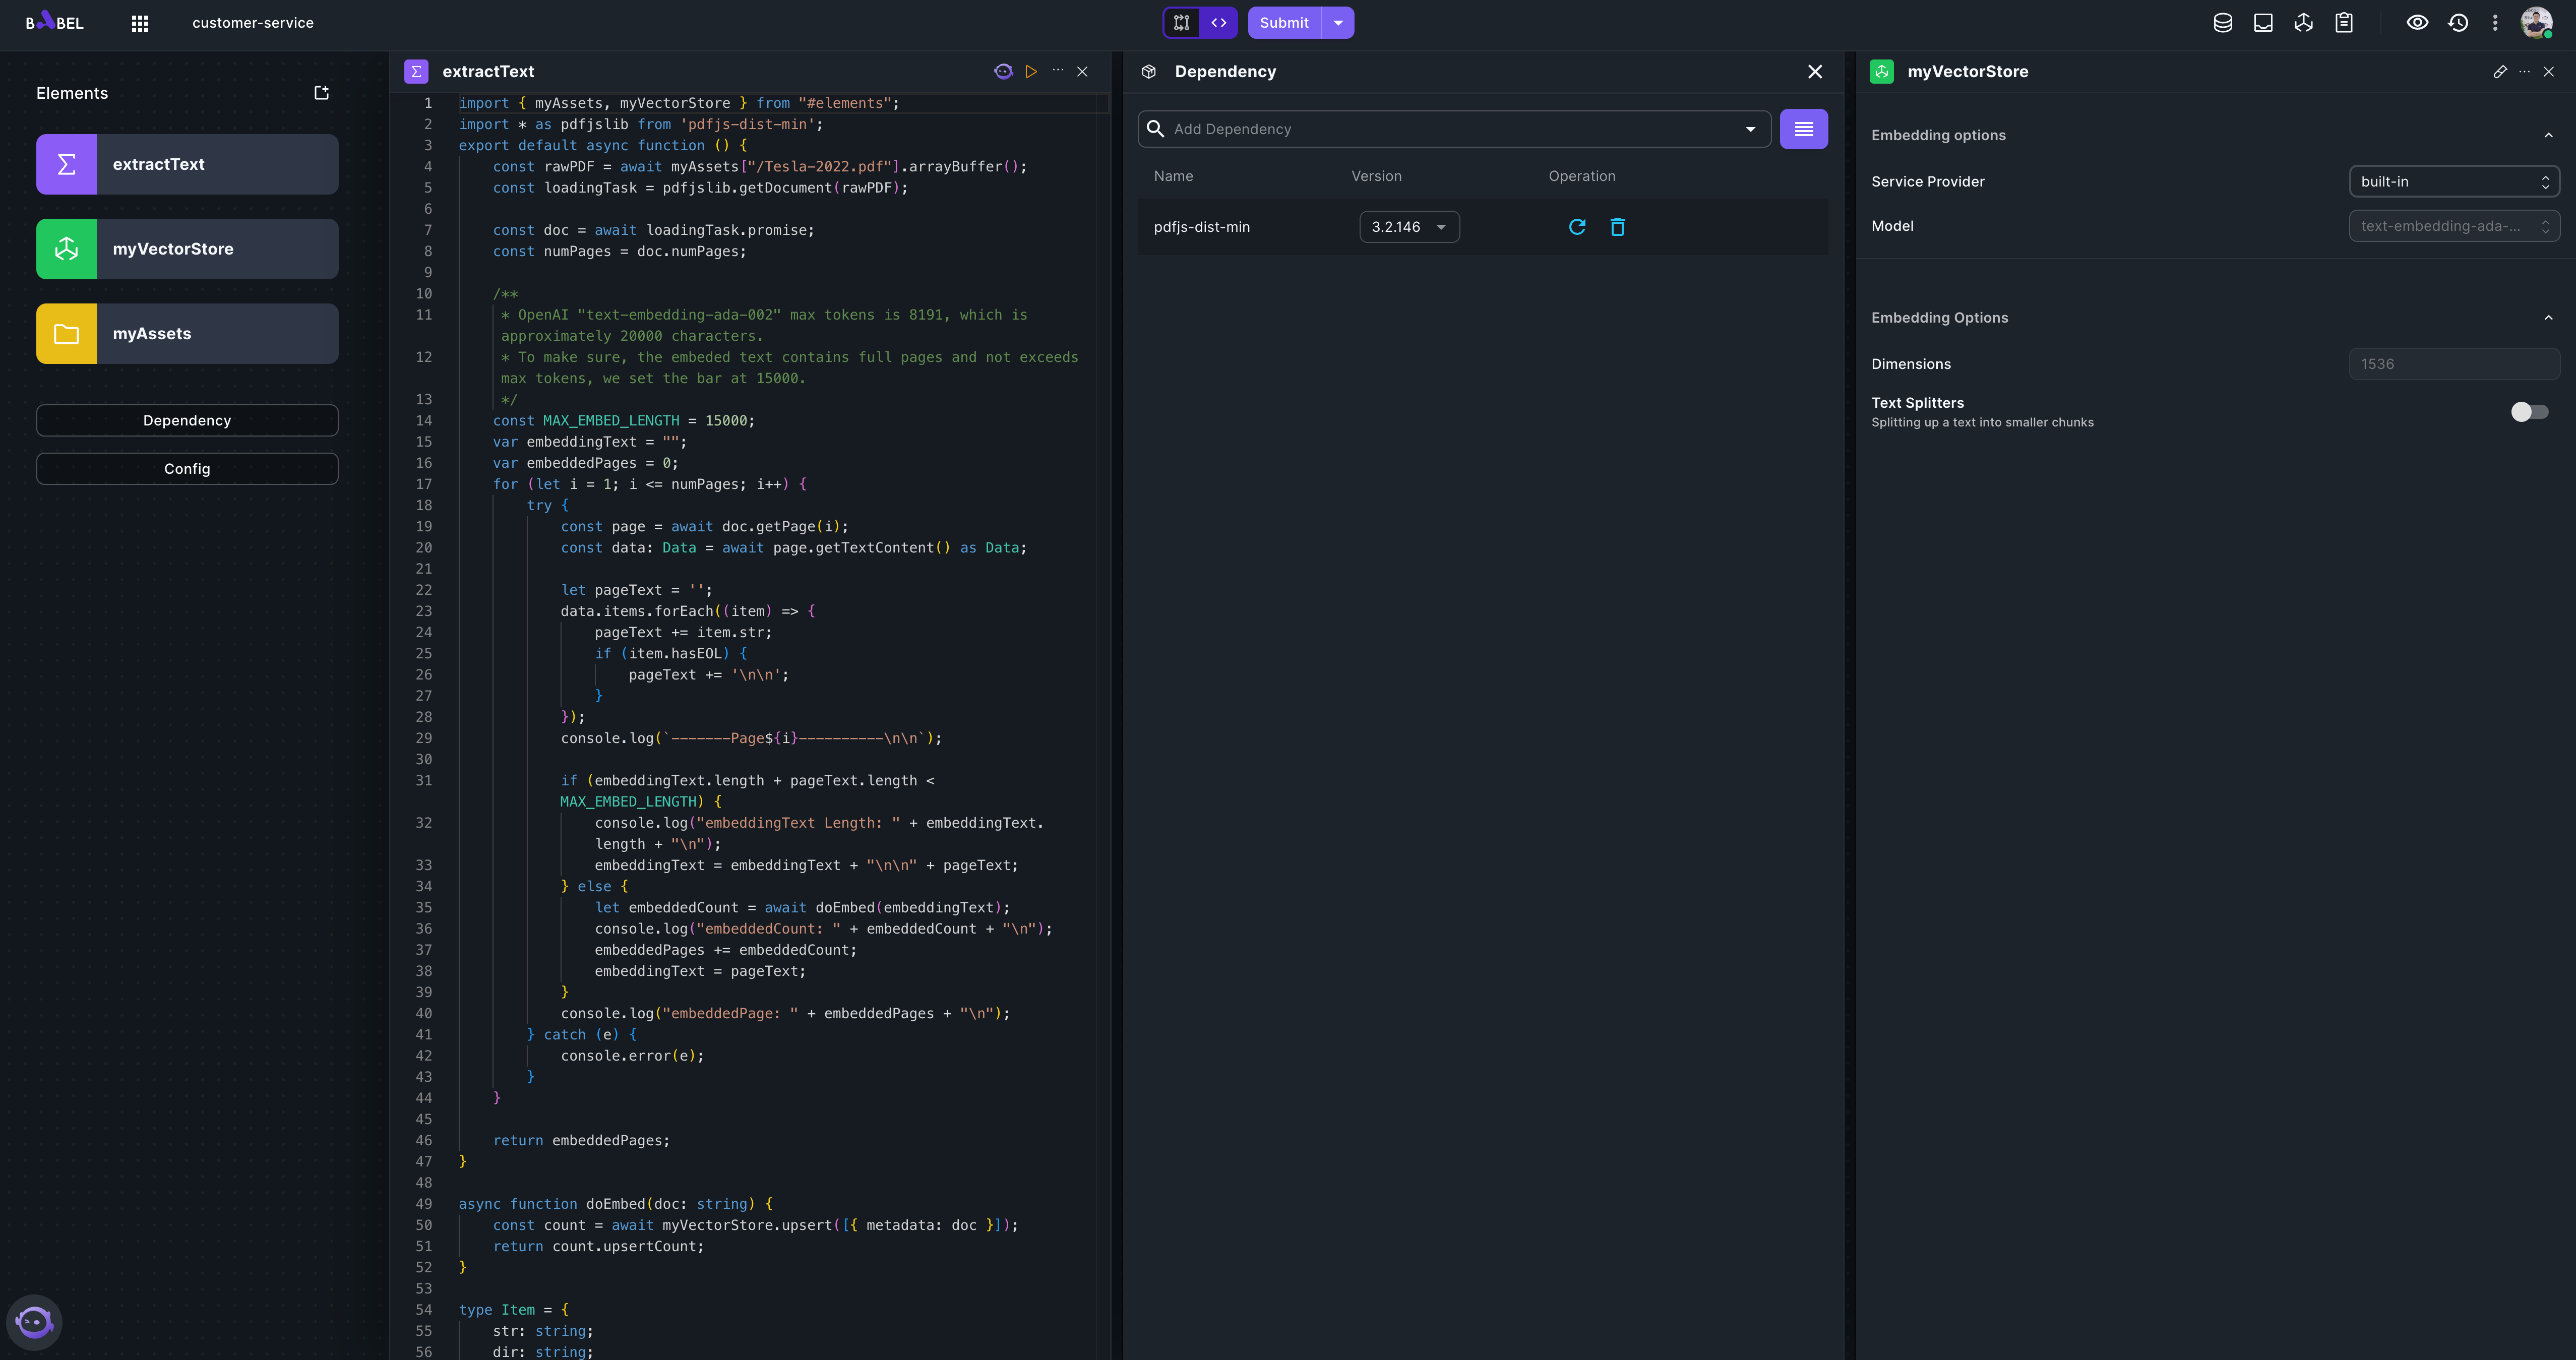
Please set "myVectorStore" as screenshot above, use built-in provider. Here is the complete code for "extractText" element.
import { myAssets, myVectorStore } from "#elements";
import * as pdfjslib from 'pdfjs-dist-min';
export default async function () {
    const rawPDF = await myAssets["/Tesla-2022.pdf"].arrayBuffer();
    const loadingTask = pdfjslib.getDocument(rawPDF);

    const doc = await loadingTask.promise;
    const numPages = doc.numPages;

    /**
     * OpenAI "text-embedding-ada-002" max tokens is 8191, which is approximately 20000 characters.
     * To make sure, the embeded text contains full pages and not exceeds max tokens, we set the bar at 15000.
     */
    const MAX_EMBED_LENGTH = 15000;
    var embeddingText = "";
    var embeddedPages = 0;
    for (let i = 1; i <= numPages; i++) {
        try {
            const page = await doc.getPage(i);
            const data: Data = await page.getTextContent() as Data;

            let pageText = '';
            data.items.forEach((item) => {
                pageText += item.str;
                if (item.hasEOL) {
                    pageText += '\n\n';
                }
            });
            console.log(`-------Page${i}----------\n\n`);

            if (embeddingText.length + pageText.length < MAX_EMBED_LENGTH) {
                console.log("embeddingText Length: " + embeddingText.length + "\n");
                embeddingText = embeddingText + "\n\n" + pageText;
            } else {
                let embeddedCount = await doEmbed(embeddingText);
                console.log("embeddedCount: " + embeddedCount + "\n");
                embeddedPages += embeddedCount;
                embeddingText = pageText;
            }
            console.log("embeddedPage: " + embeddedPages + "\n");
        } catch (e) {
            console.error(e);
        }
    }

    return embeddedPages;
}

async function doEmbed(doc: string) {
    const count = await myVectorStore.upsert([{ metadata: doc }]);
    return count.upsertCount;
}

type Item = {
    str: string;
    dir: string;
    width: number;
    height: number;
    transform: number[];
    fontName: string;
    hasEOL: boolean;
};

type Data = {
    items: Item[];
    styles: {
        [key: string]: {
            fontFamily: string;
            ascent: number;
            descent: number;
            vertical: boolean;
        };
    };
};
Here we use package "pdfjs-dist-min" to parse pdf file. So, remember to add the package in Dependency.
-
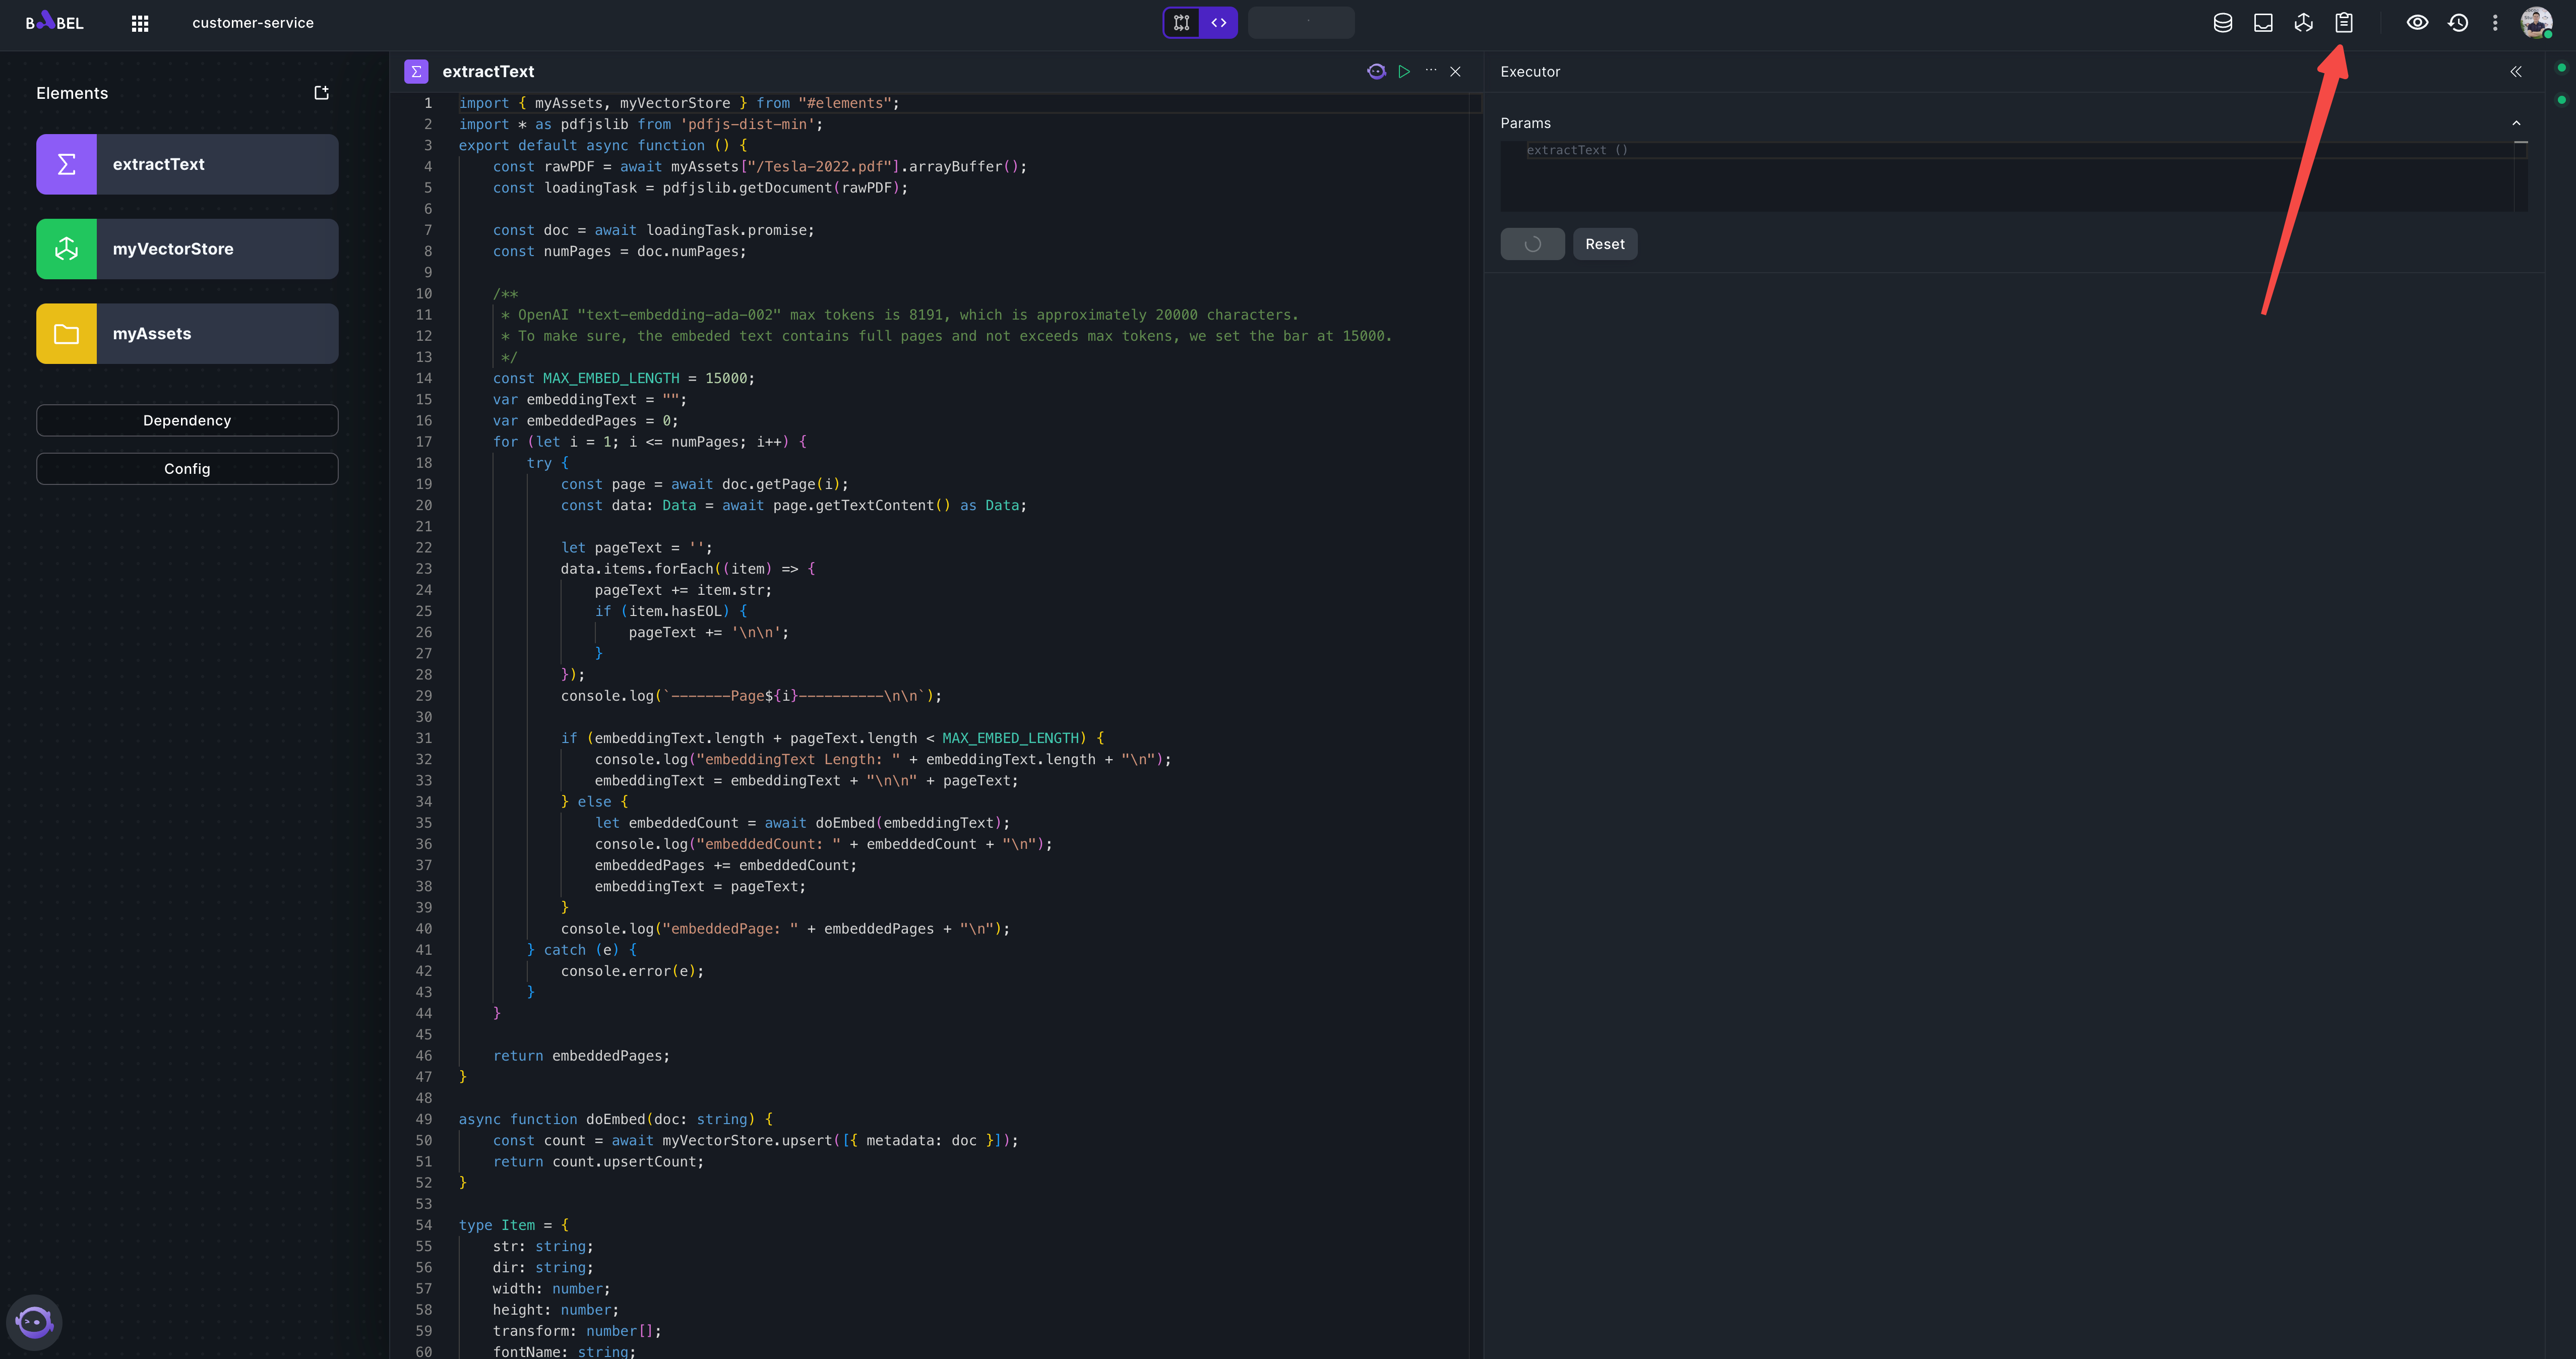
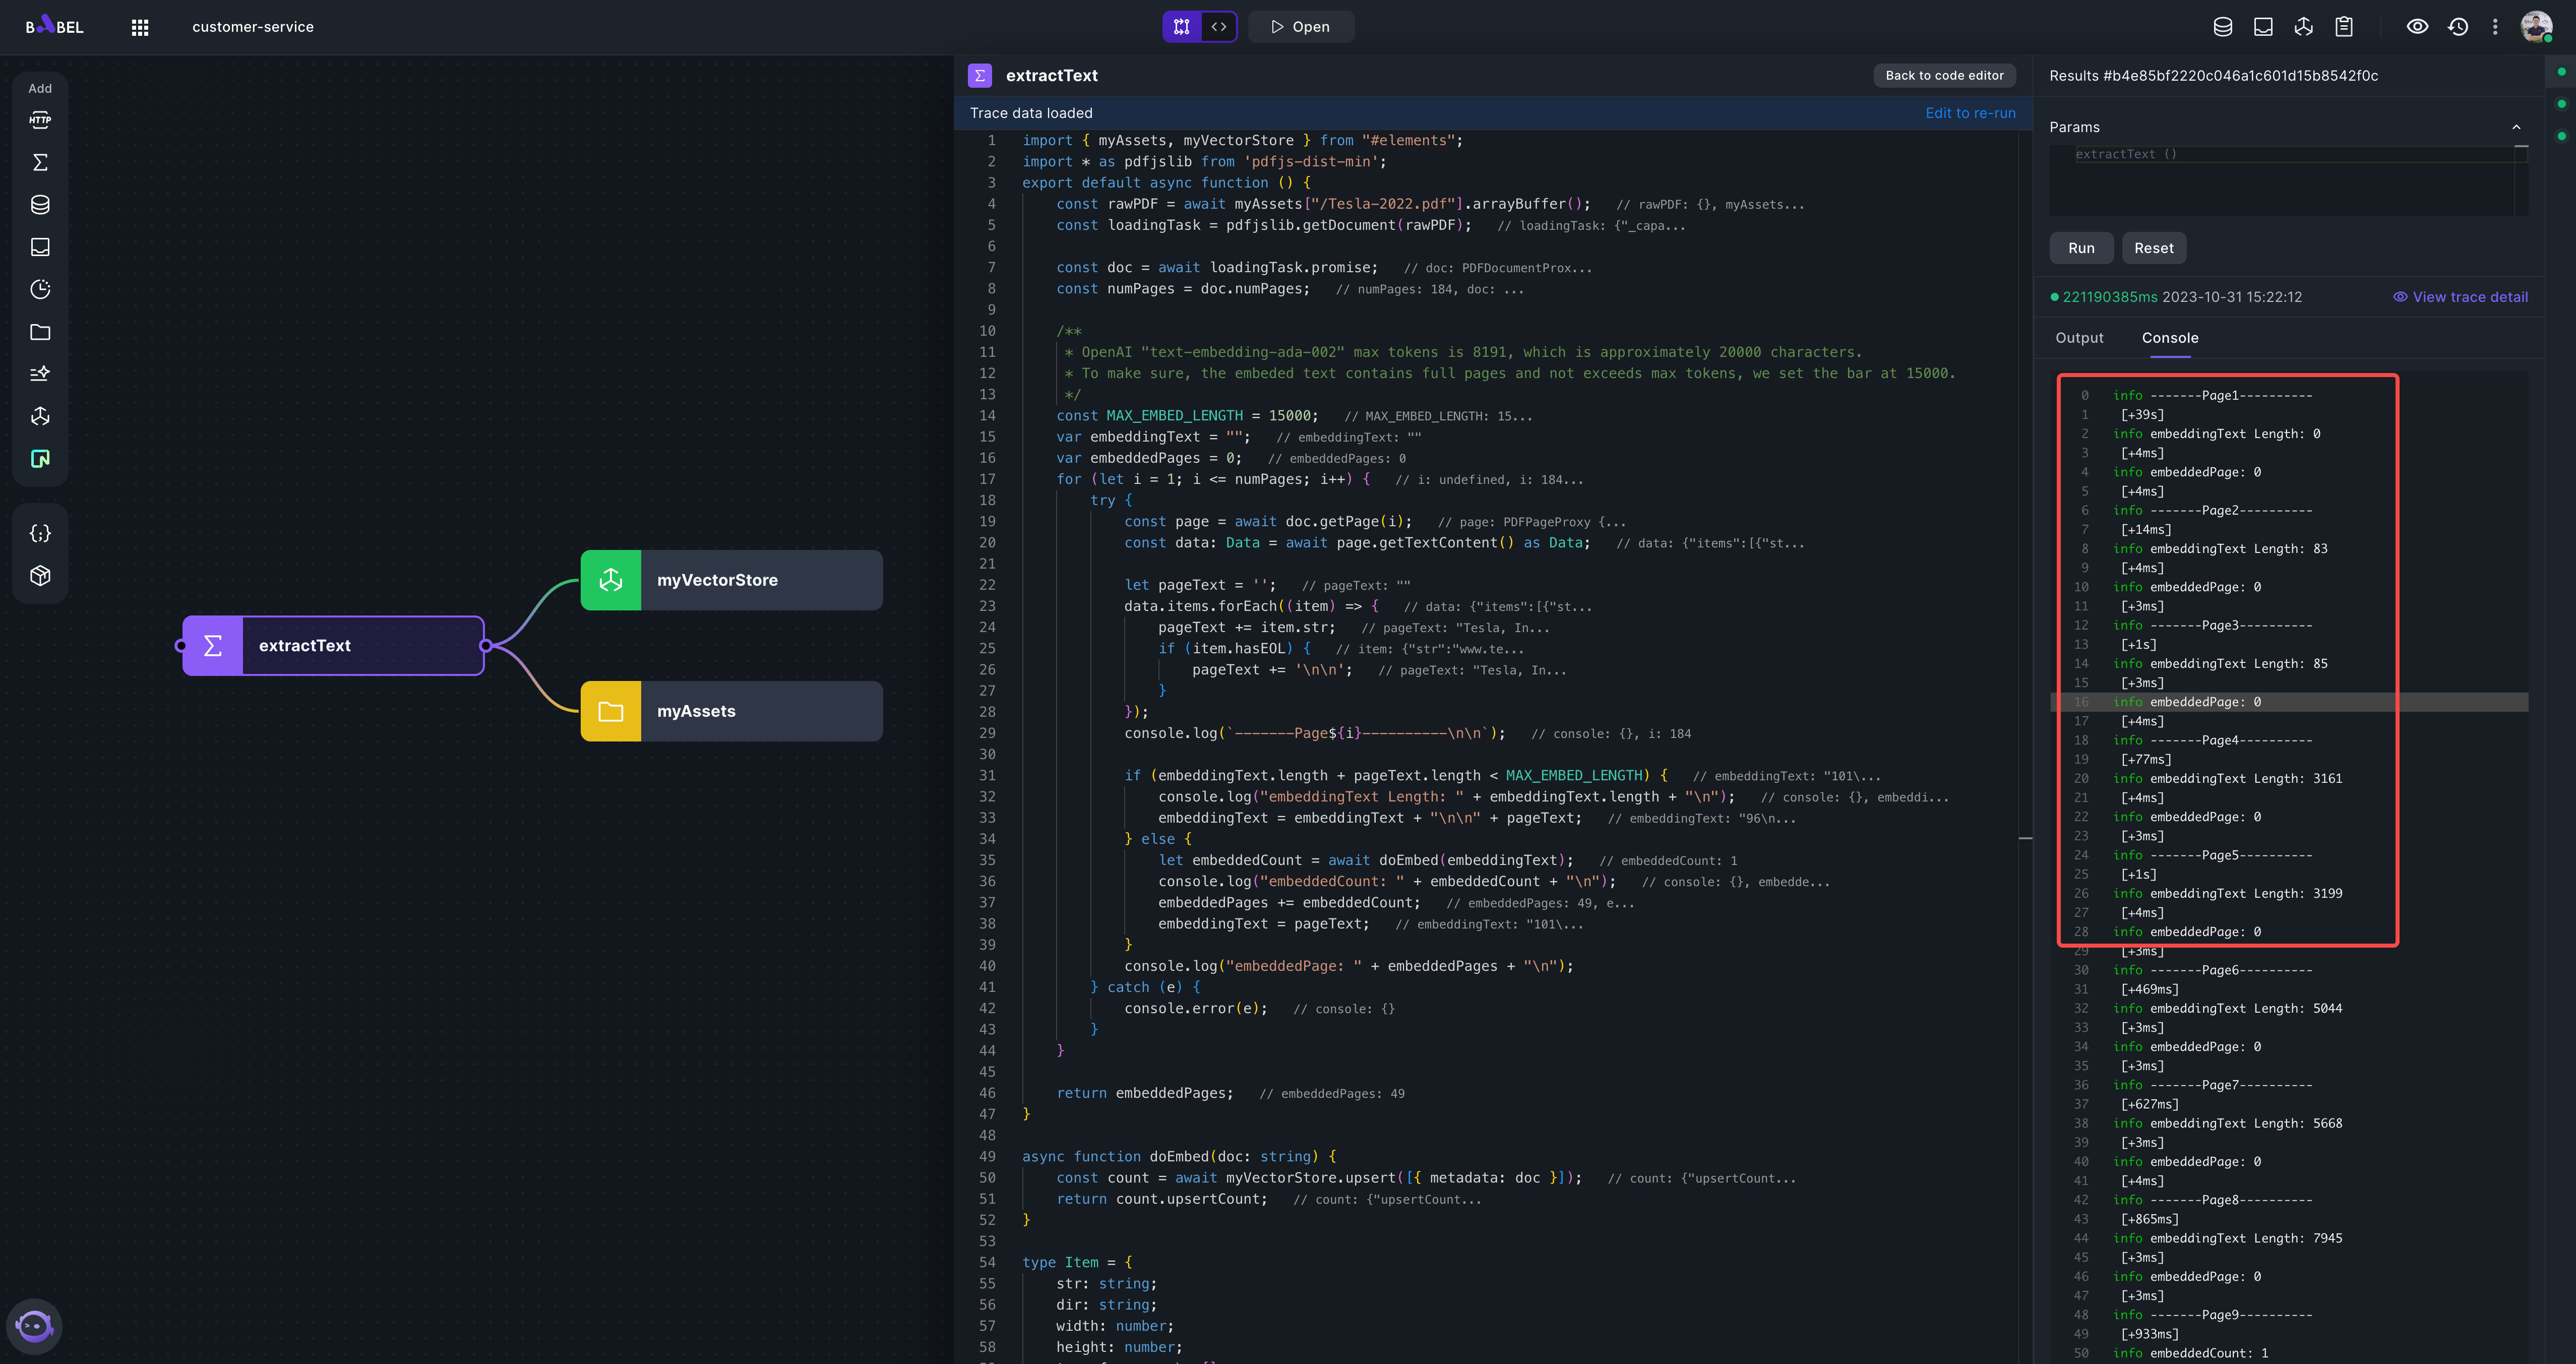
Close Dependency and myVectorStore tab and execute extractText.
In the meantime, click the logs button to open the logs tab
You should see logs like this:
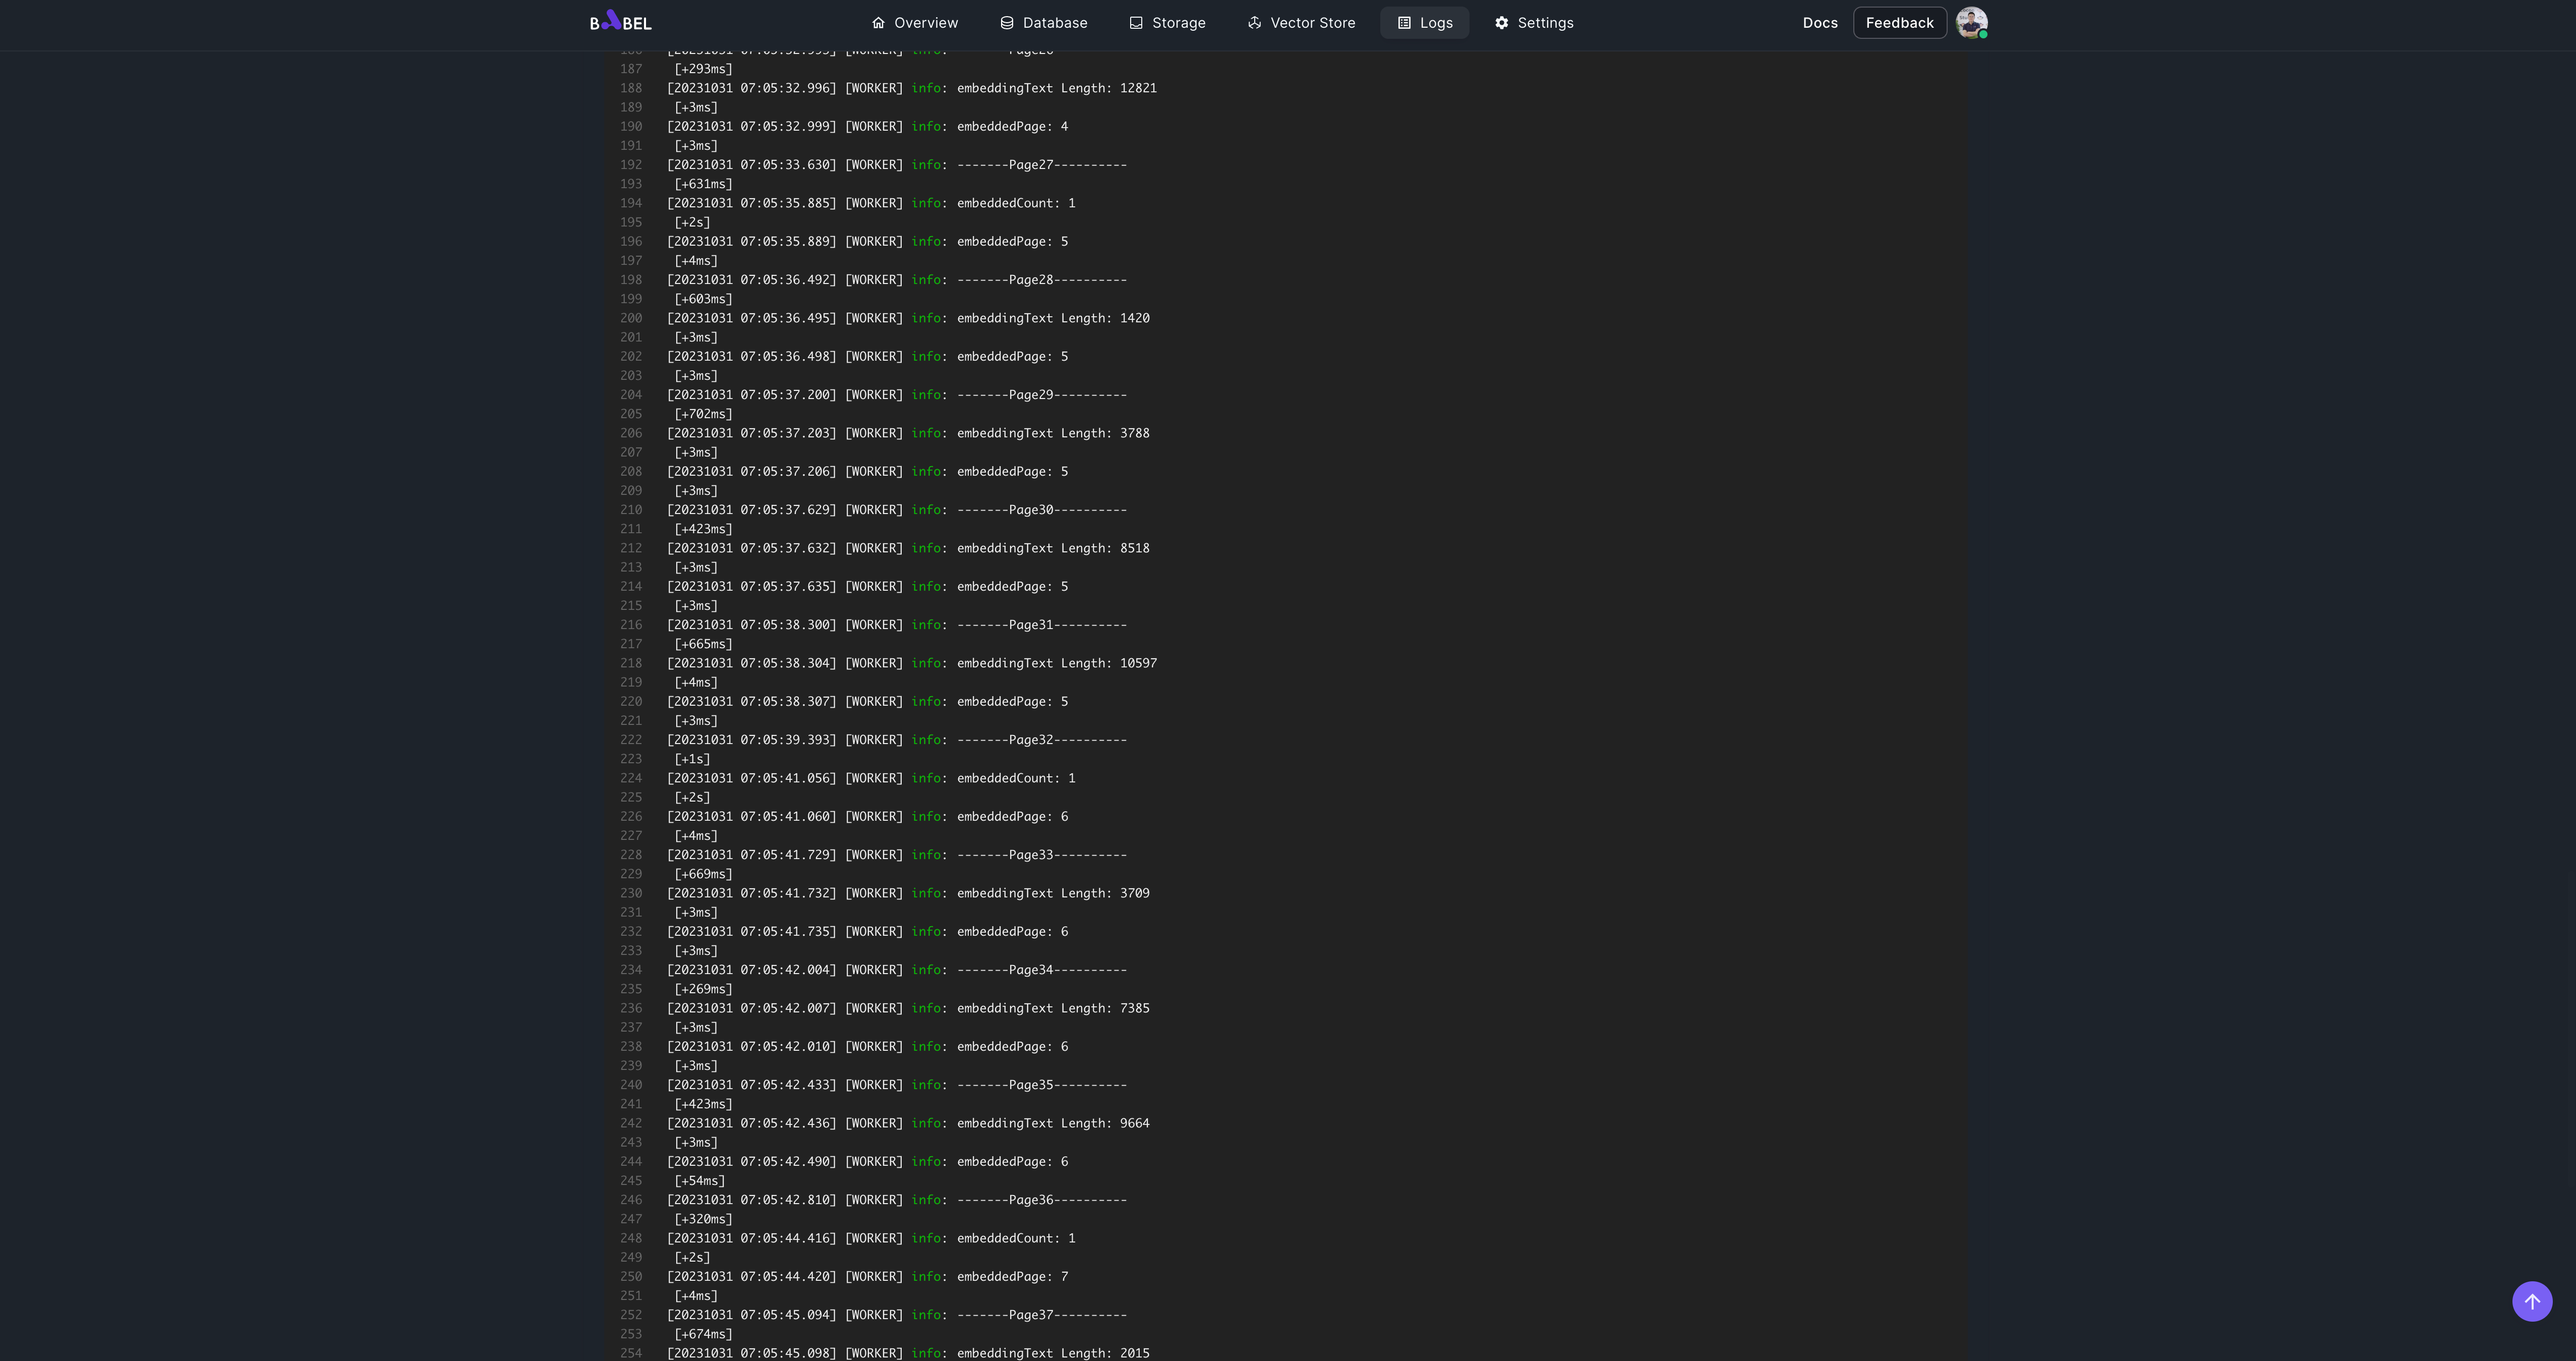
It may take 3 minutes to embed all the pages into vector store. After the execution, you should see the embeddedPages 49.
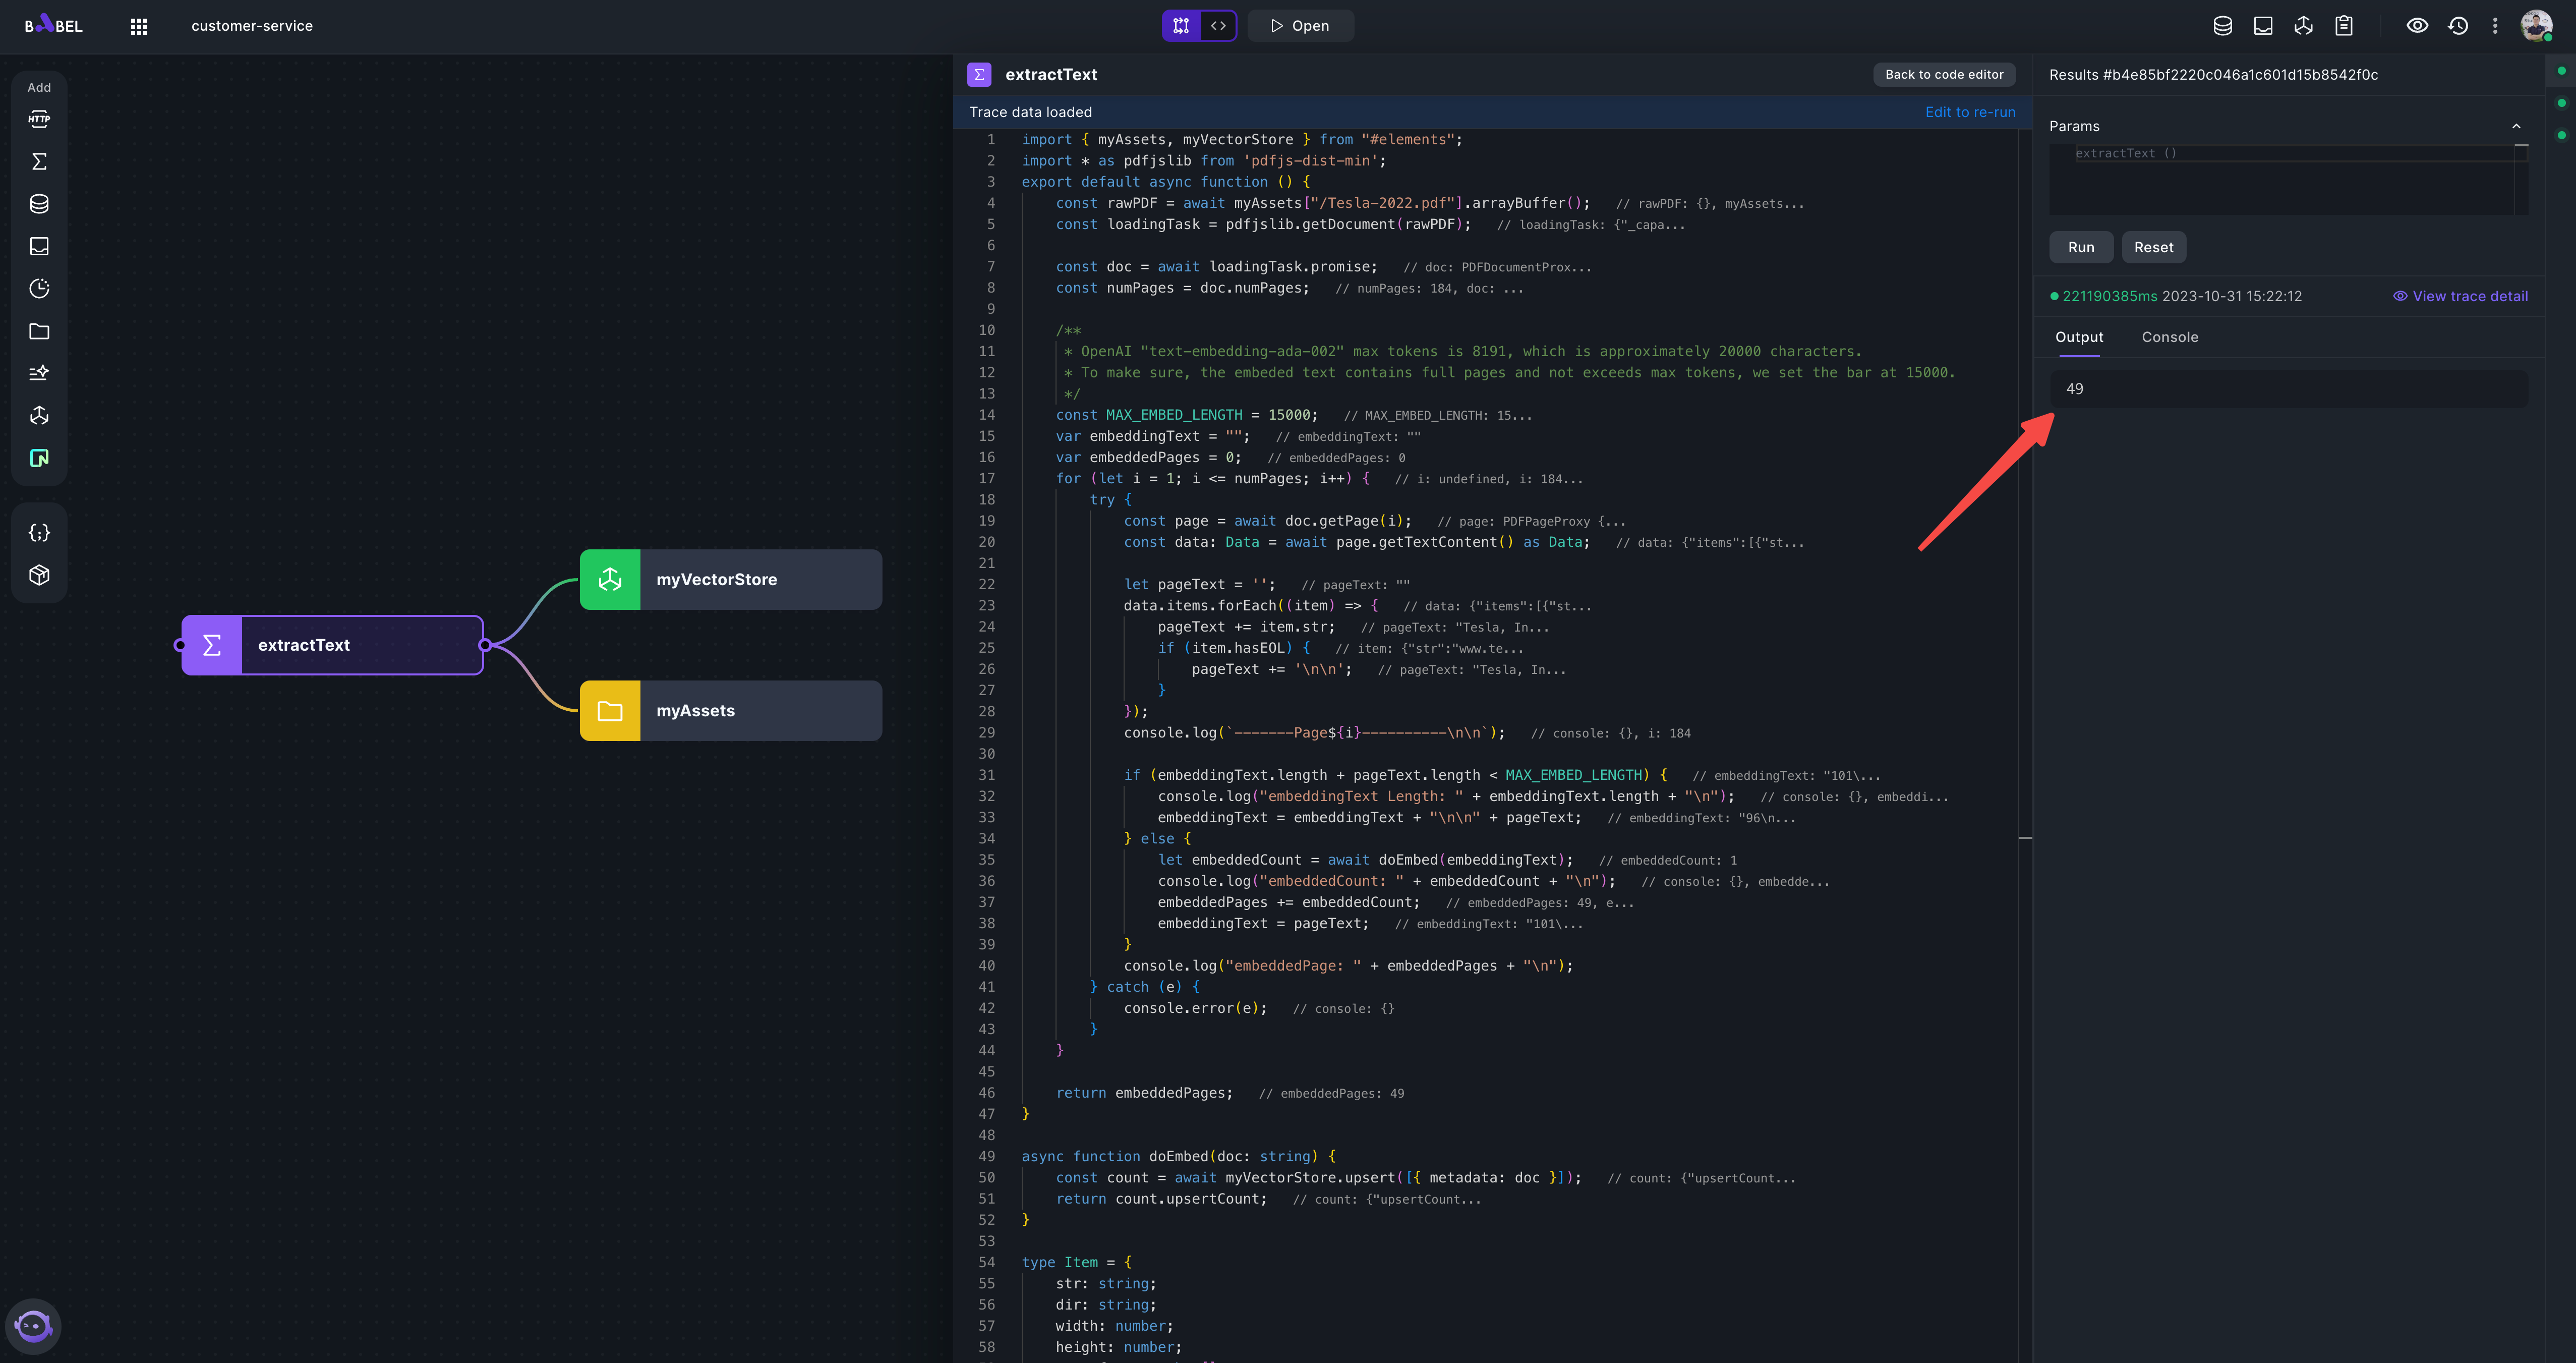
You can also see the logs in executor console
If in any case, you need to clear the VectorStore, you can add a Function element with following code:
import {myVectorStore} from "#elements";
export default async function () {
    const count = await myVectorStore.deleteAll();
    return count.upsertCount;
}
Now,we have a Tesla 2022 Annual Report knowledge base, ready to use.
-
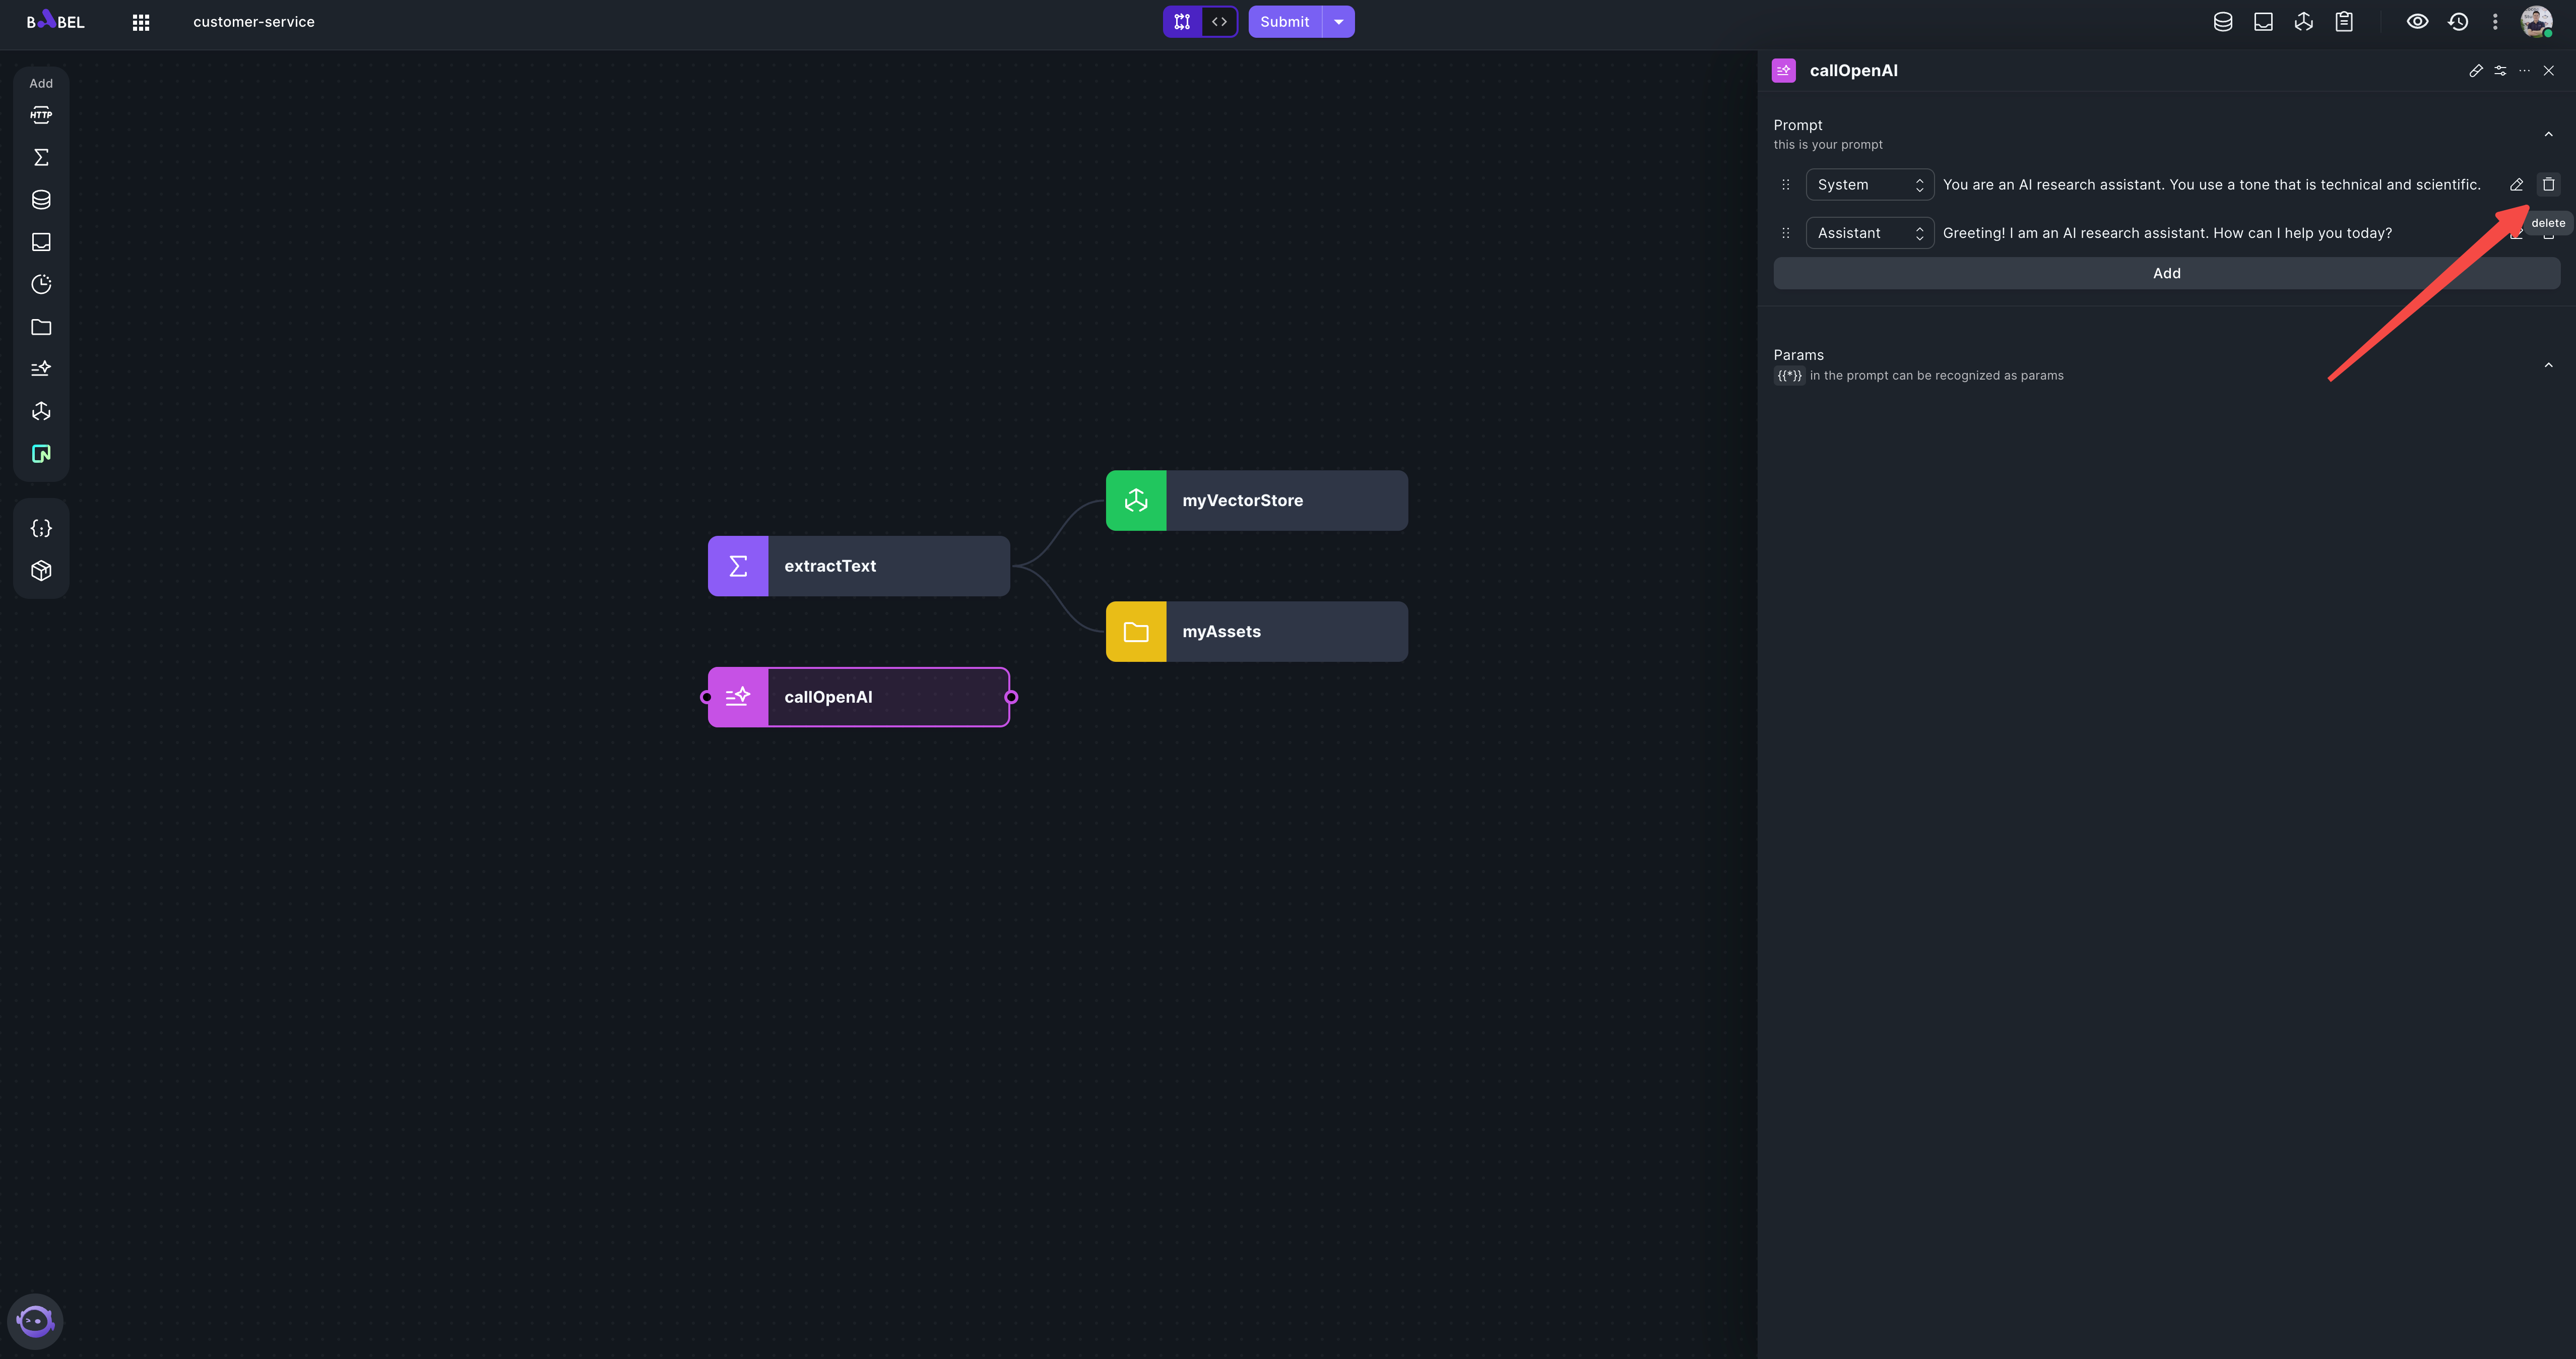
Next, let's build backend API for the customer service agent. Add a LLMExecutor element "callOpenAI", using OpenAI as the provider. You need to set the OpenAI key.

Delete the default system and assistant message
-
Add a Function element "getTeslaNews" which will return Tesla related news in brief.
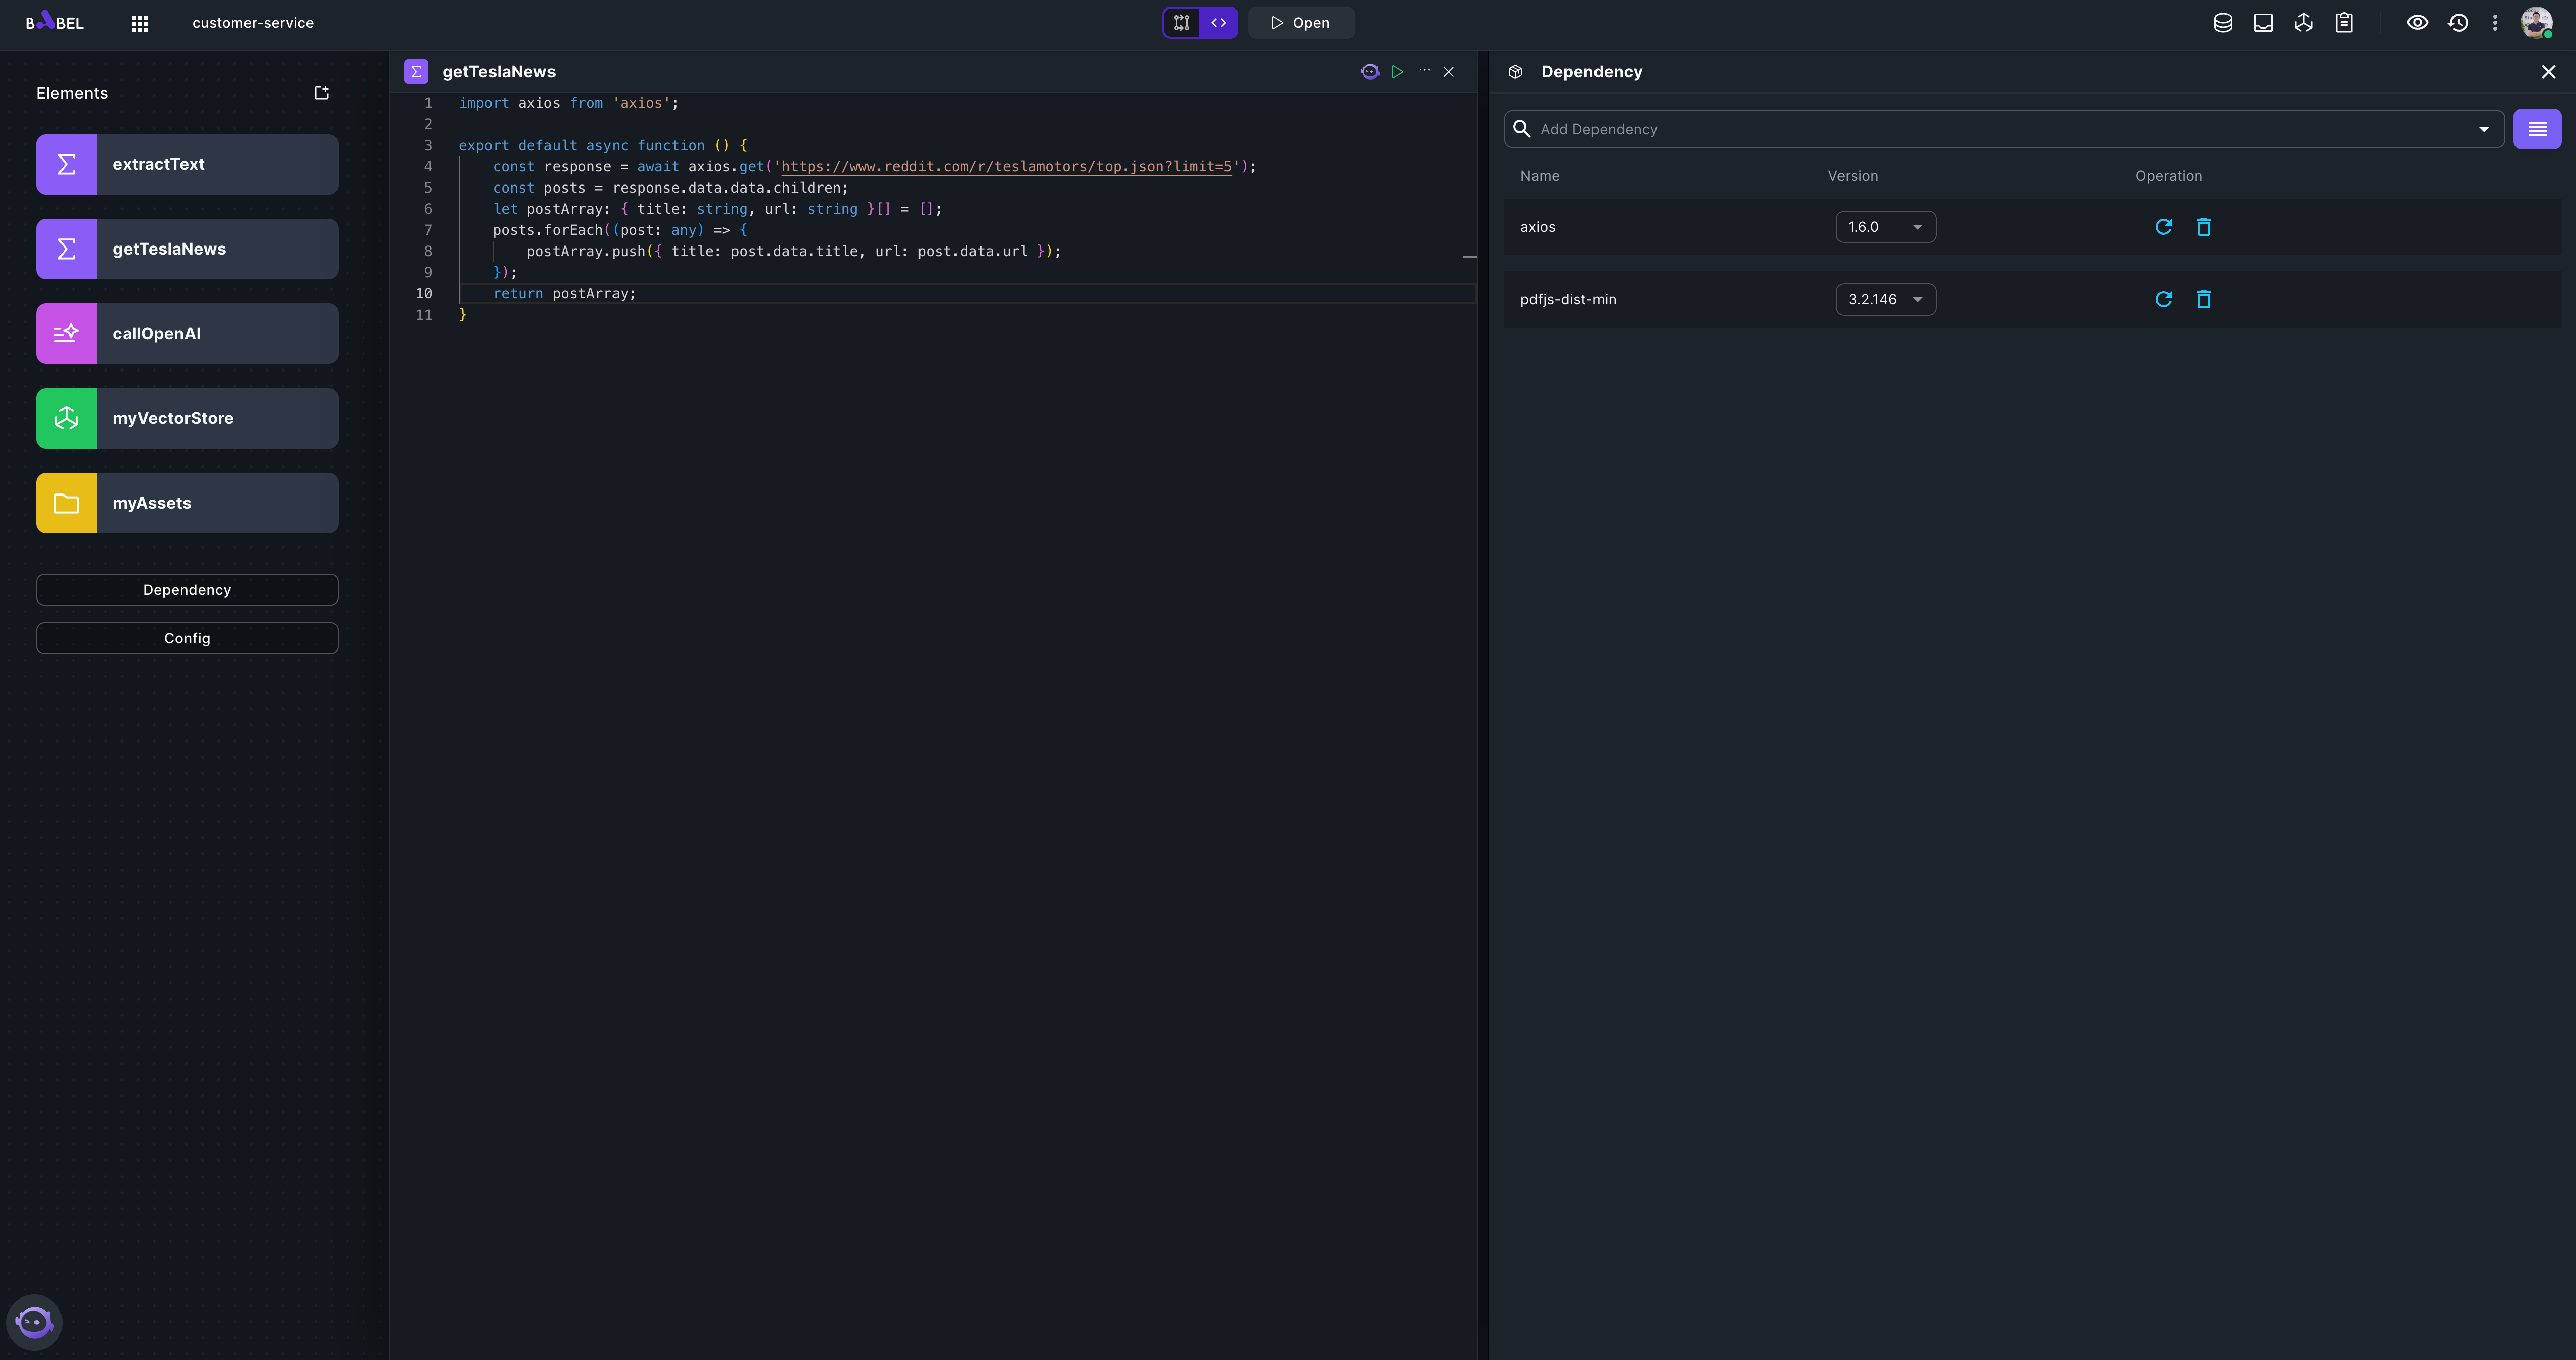
import axios from 'axios';

export default async function () {
    const response = await axios.get('https://www.reddit.com/r/teslamotors/top.json?limit=5');
    const posts = response.data.data.children;
    let postArray: { title: string, url: string }[] = [];
    posts.forEach((post: any) => {
        postArray.push({ title: post.data.title, url: post.data.url });
    });
    return postArray;
}
Remember to add "axios" in the Dependency.
-
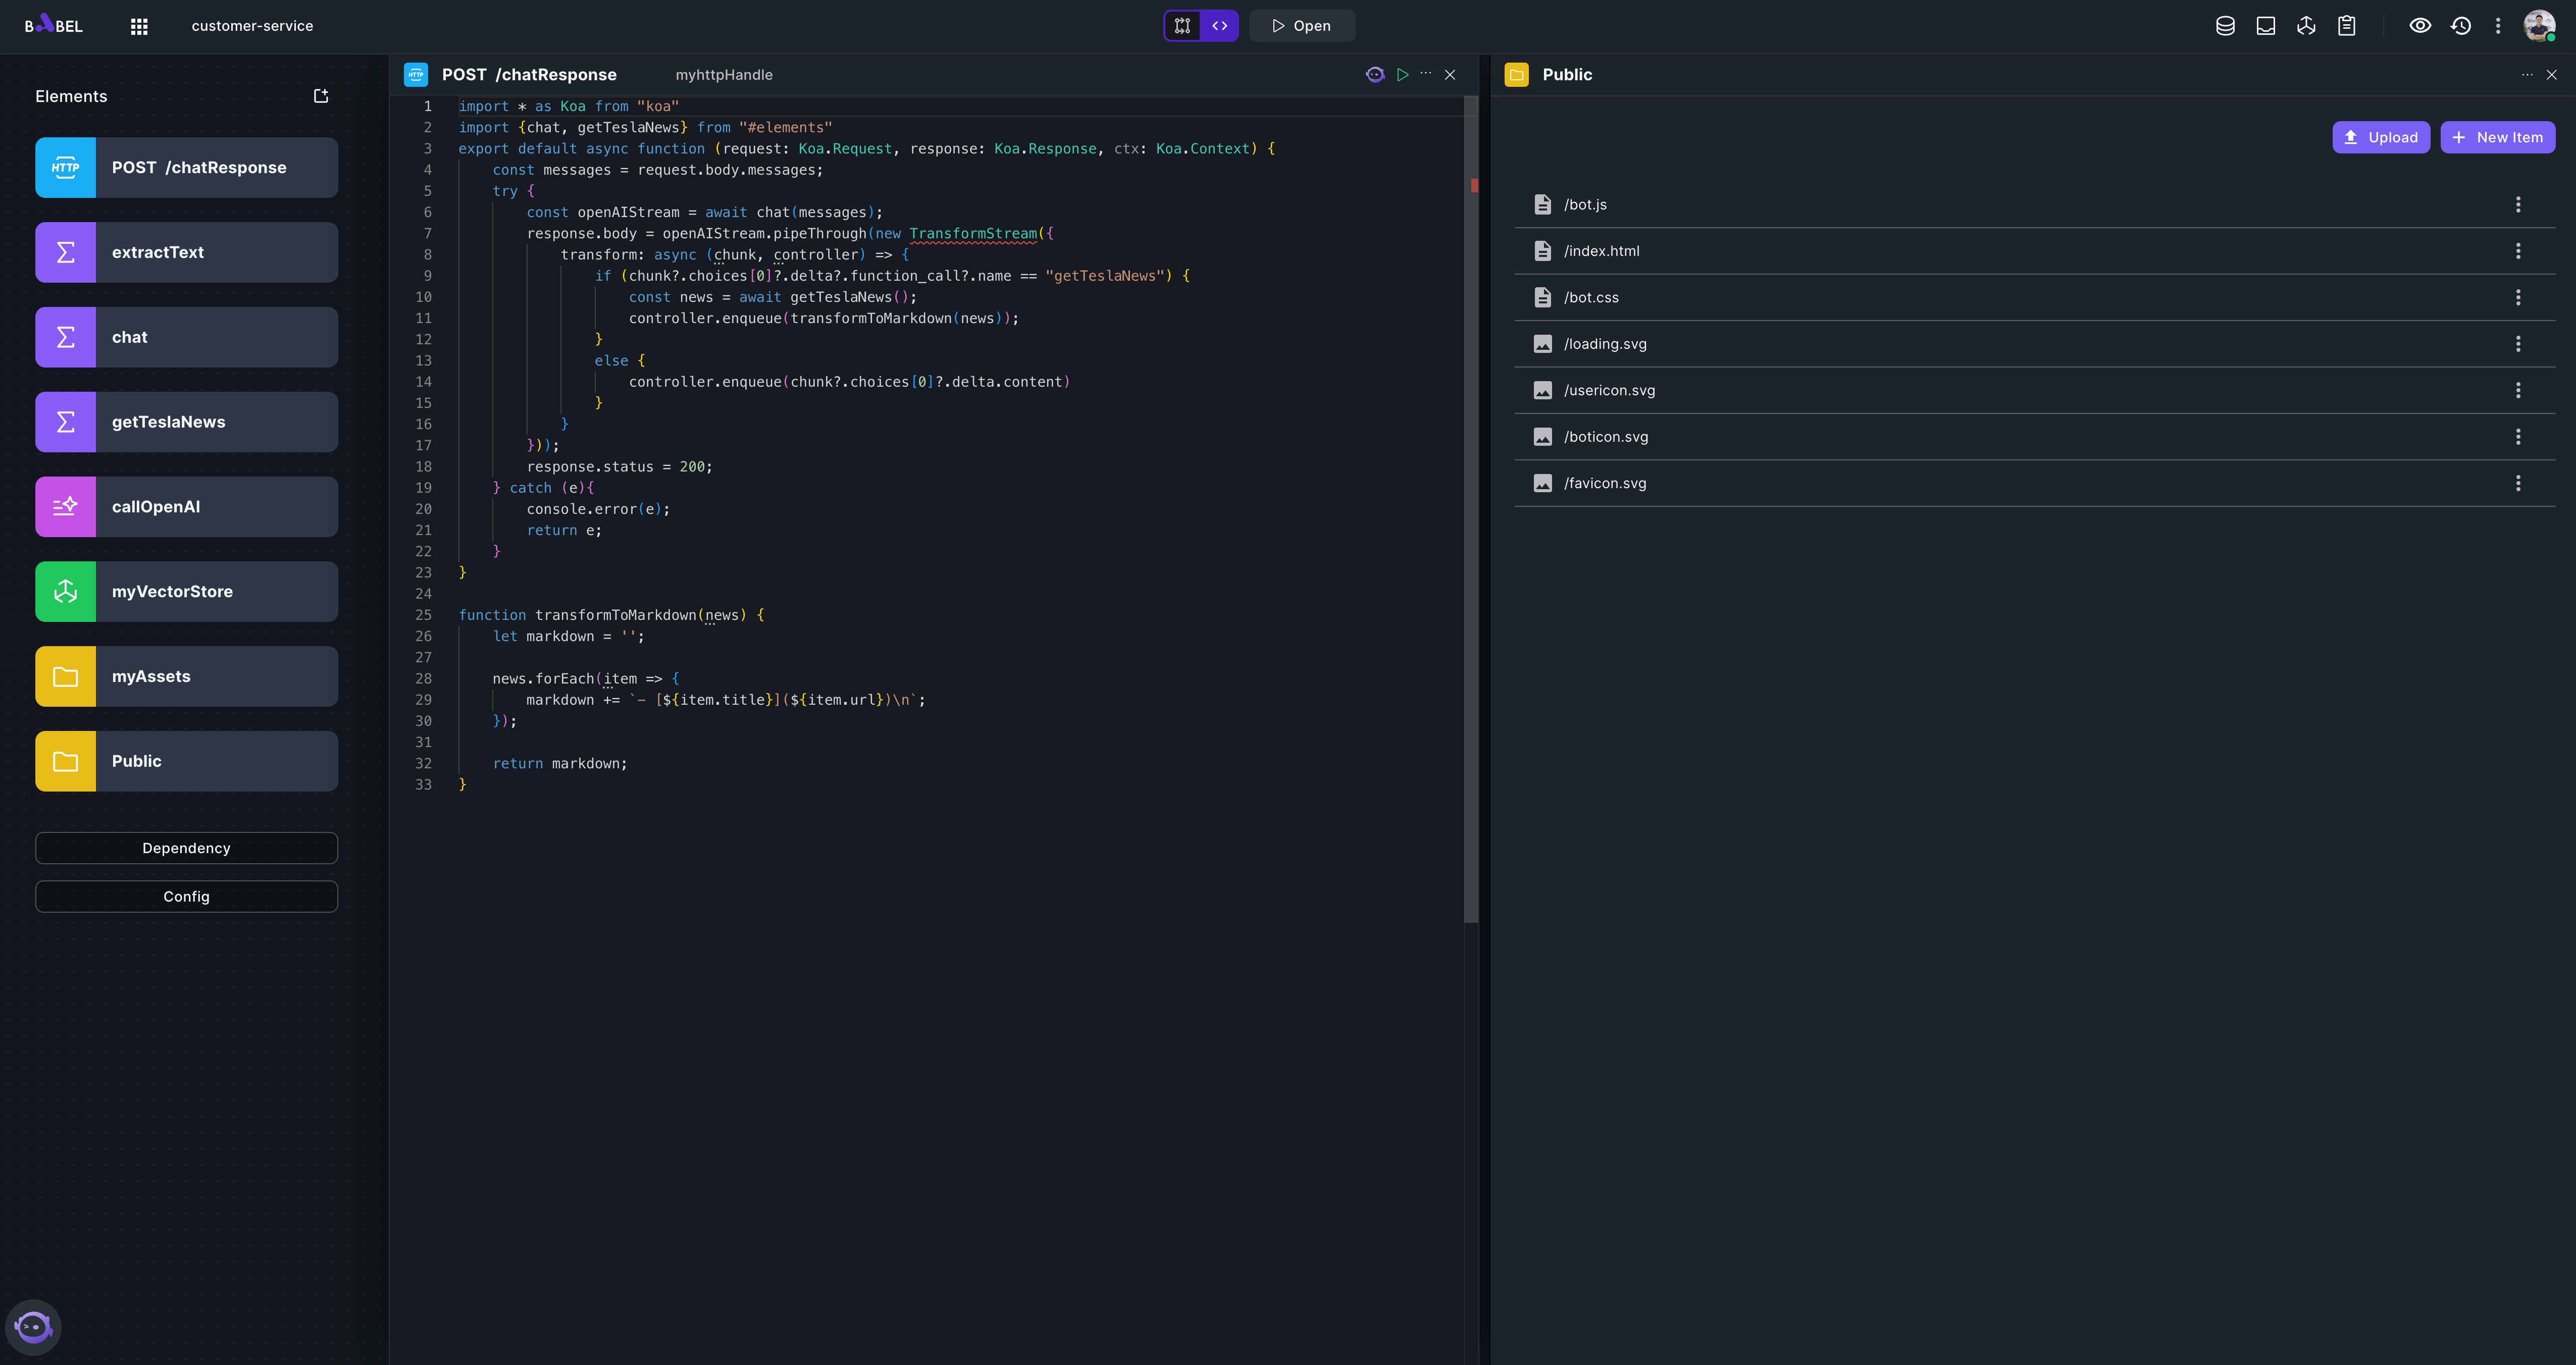
Add a Function element "chat" which retrieves myVectorStore to get related info and assembles prompt and call LLM to get result. And an HTTP element POST /chatResponse as API to handle the chat request from client.
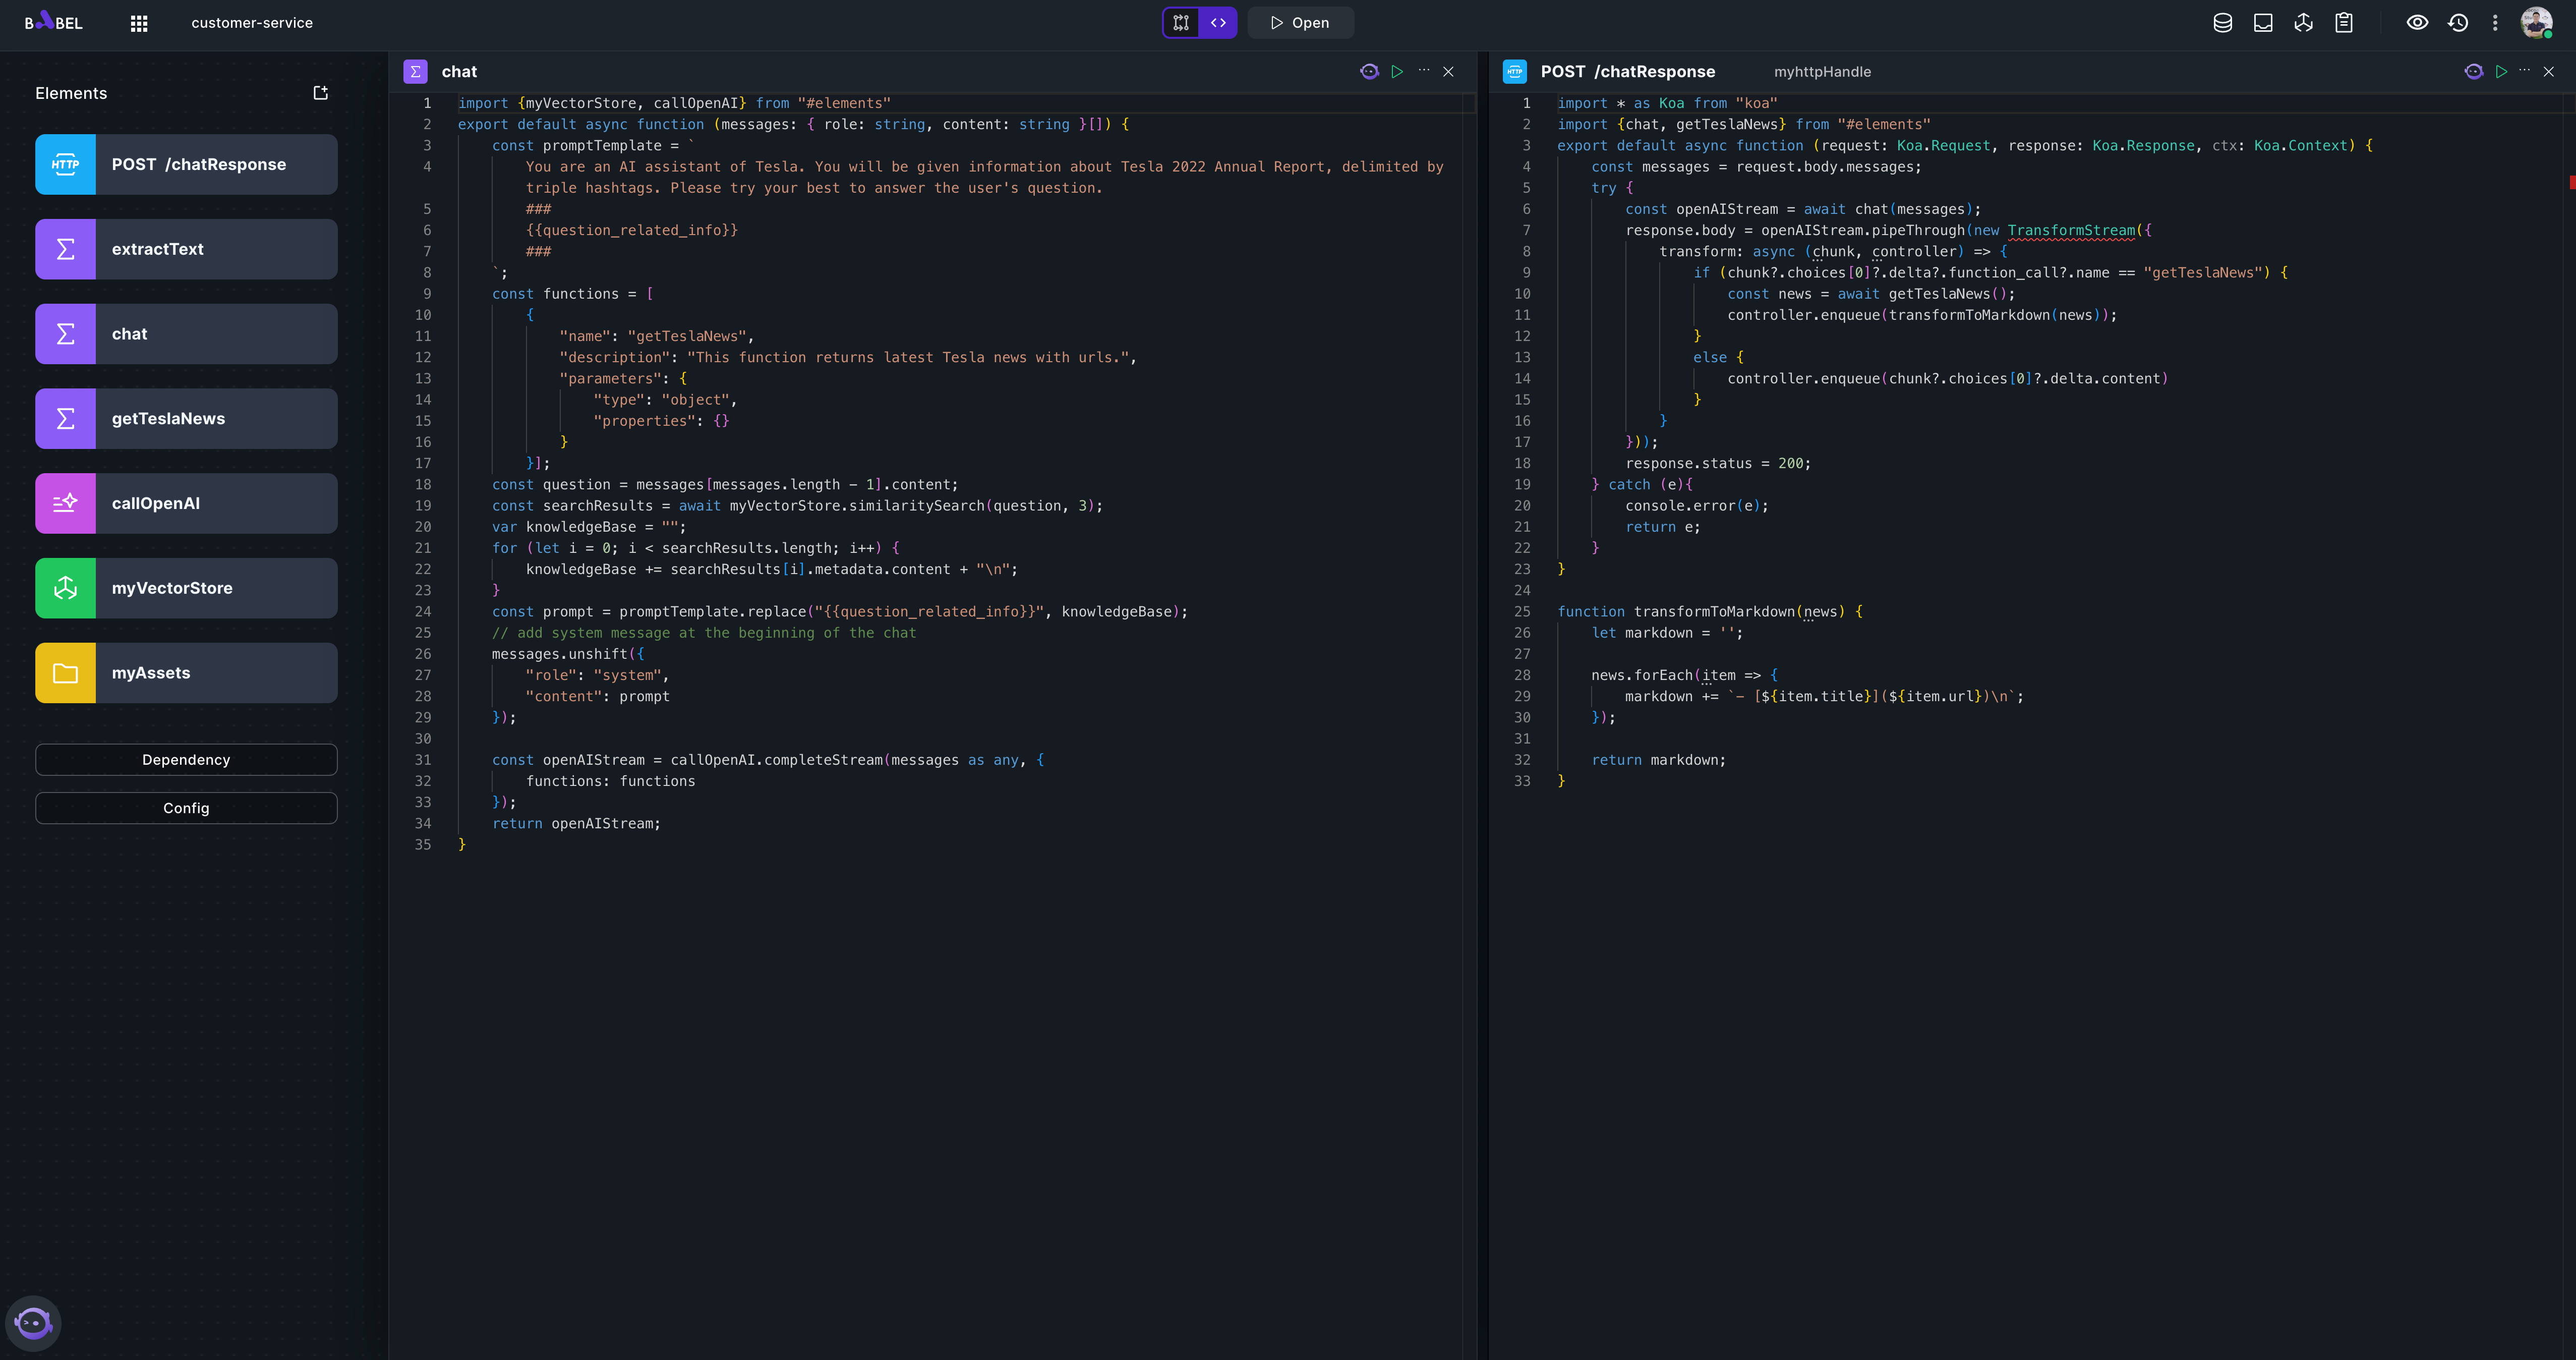
import {myVectorStore, callOpenAI} from "#elements";
export default async function (messages: { role: string, content: string }[]) {
    const promptTemplate = `
        You are an AI assistant of Tesla. You will be given information about Tesla 2022 Annual Report, delimited by triple hashtags. Please try your best to answer the user's question.
        ###
        {{question_related_info}}
        ###
    `;
    const functions = [
        {
            "name": "getTeslaNews",
            "description": "This function returns latest Tesla news with urls.",
            "parameters": {
                "type": "object",
                "properties": {}
            }
        }];
    const question = messages[messages.length - 1].content;
    const searchResults = await myVectorStore.similaritySearch(question, 3);
    var knowledgeBase = "";
    for (let i = 0; i < searchResults.length; i++) {
        knowledgeBase += searchResults[i].metadata.content + "\n";
    }
    const prompt = promptTemplate.replace("{{question_related_info}}", knowledgeBase);
    // add system message at the beginning of the chat
    messages.unshift({
        "role": "system",
        "content": prompt
    });

    const openAIStream = callOpenAI.completeStream(messages as any, {
        functions: functions
    });
    return openAIStream;
}
import * as Koa from "koa"
import {chat, getTeslaNews} from "#elements";
export default async function (request: Koa.Request, response: Koa.Response, ctx: Koa.Context) {
const messages = request.body.messages;
try {
const openAIStream = await chat(messages);
response.body = openAIStream.pipeThrough(new TransformStream({
transform: async (chunk, controller) => {
if (chunk?.choices[0]?.delta?.function_call?.name == "getTeslaNews") {
const news = await getTeslaNews();
controller.enqueue(transformToMarkdown(news));
}
else {
controller.enqueue(chunk?.choices[0]?.delta.content)
}
}
}));
response.status = 200;
} catch (e){
console.error(e);
return e;
}
}
function transformToMarkdown(news) {
let markdown = '';
news.forEach(item => {
markdown += `- [${item.title}](${item.url})\n`;
});
return markdown;
} -
Now, let's build the frontend. Add an Assets element "Public". All frontend code can be found: https://github.com/babelcloud/chatbot-frontend/archive/refs/heads/main.zip . Download the zip, unzip the archive and upload all files to Public element.
-
Submit your application and open "index.html".
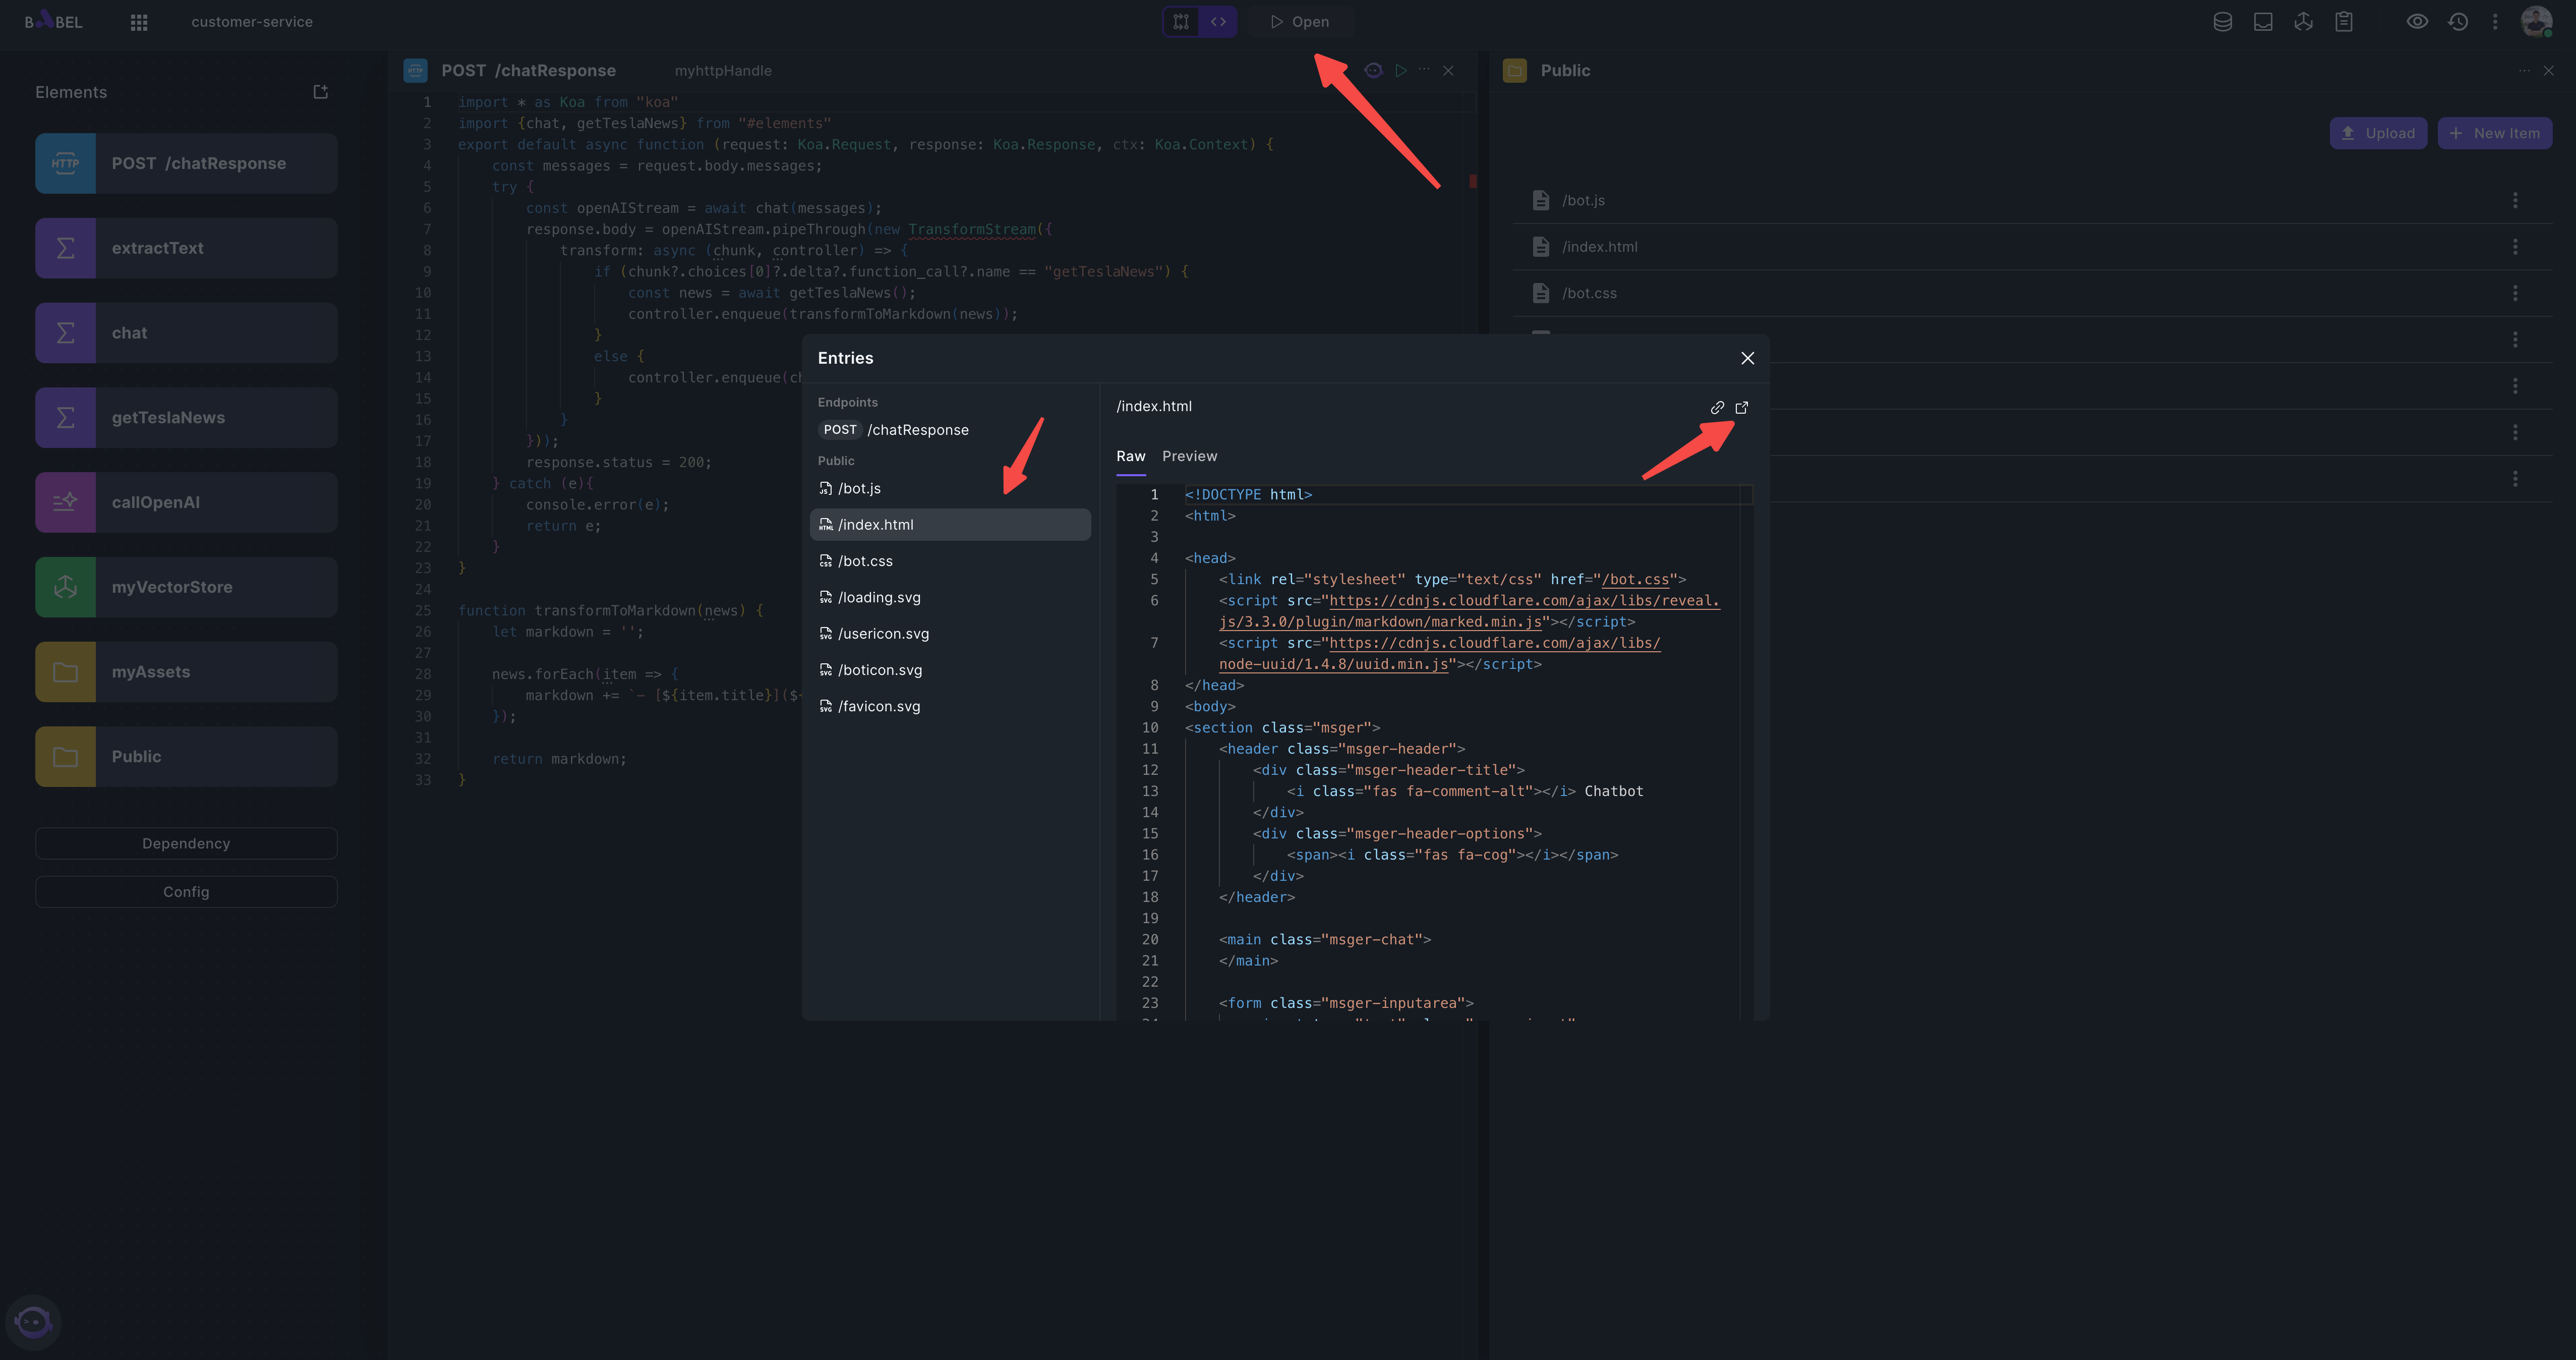
You should see a webpage like this, and you can play with it.